
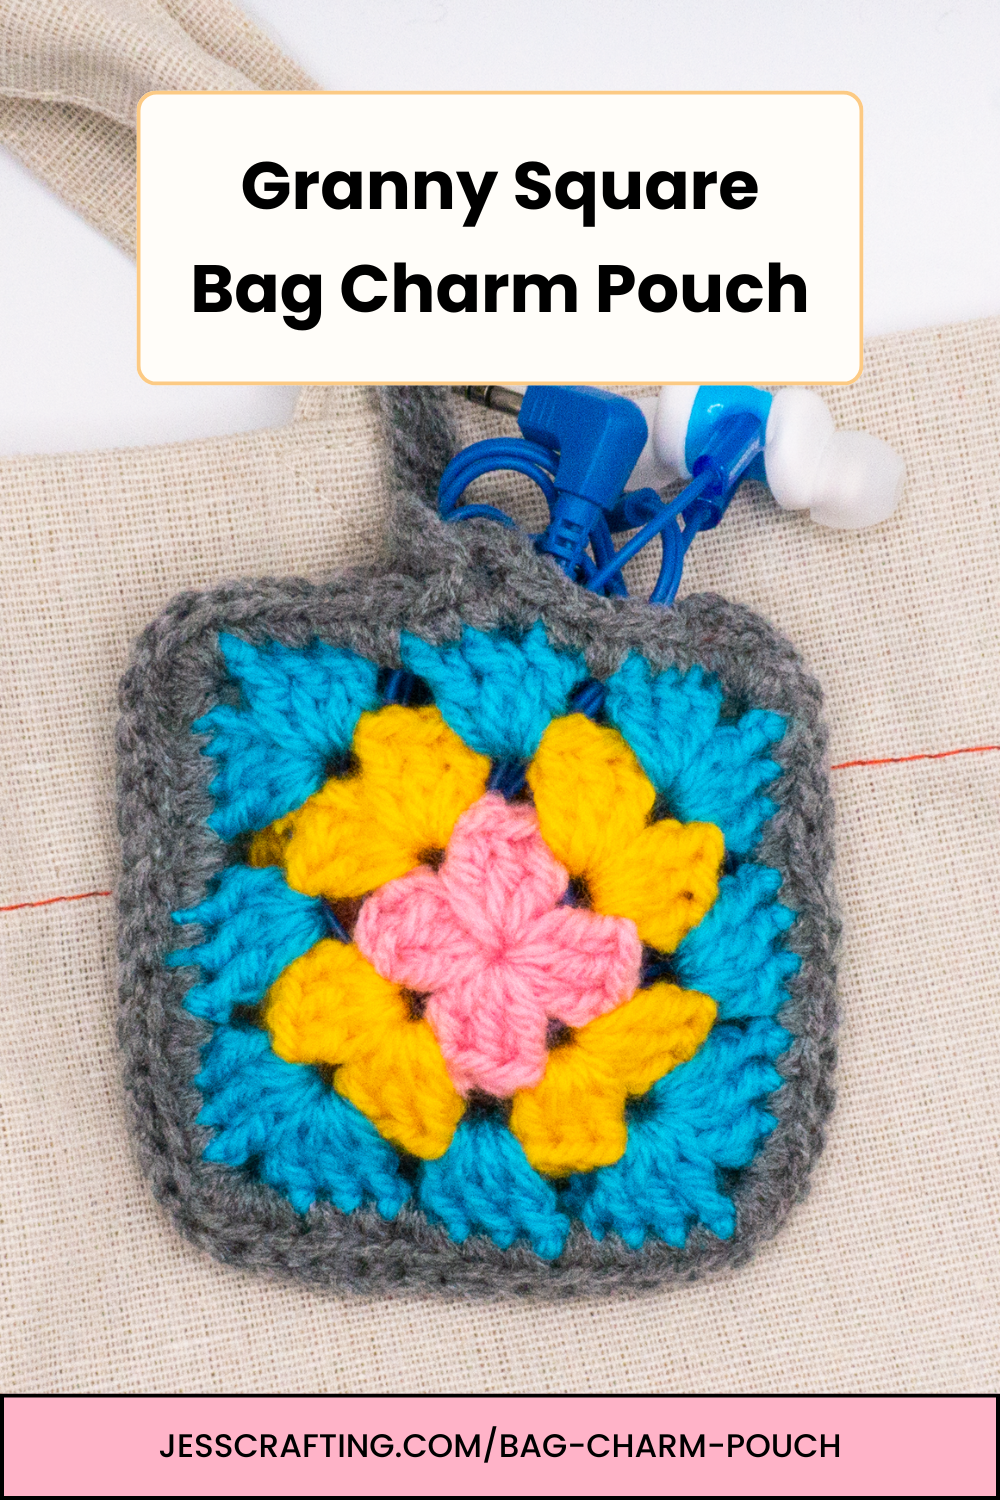
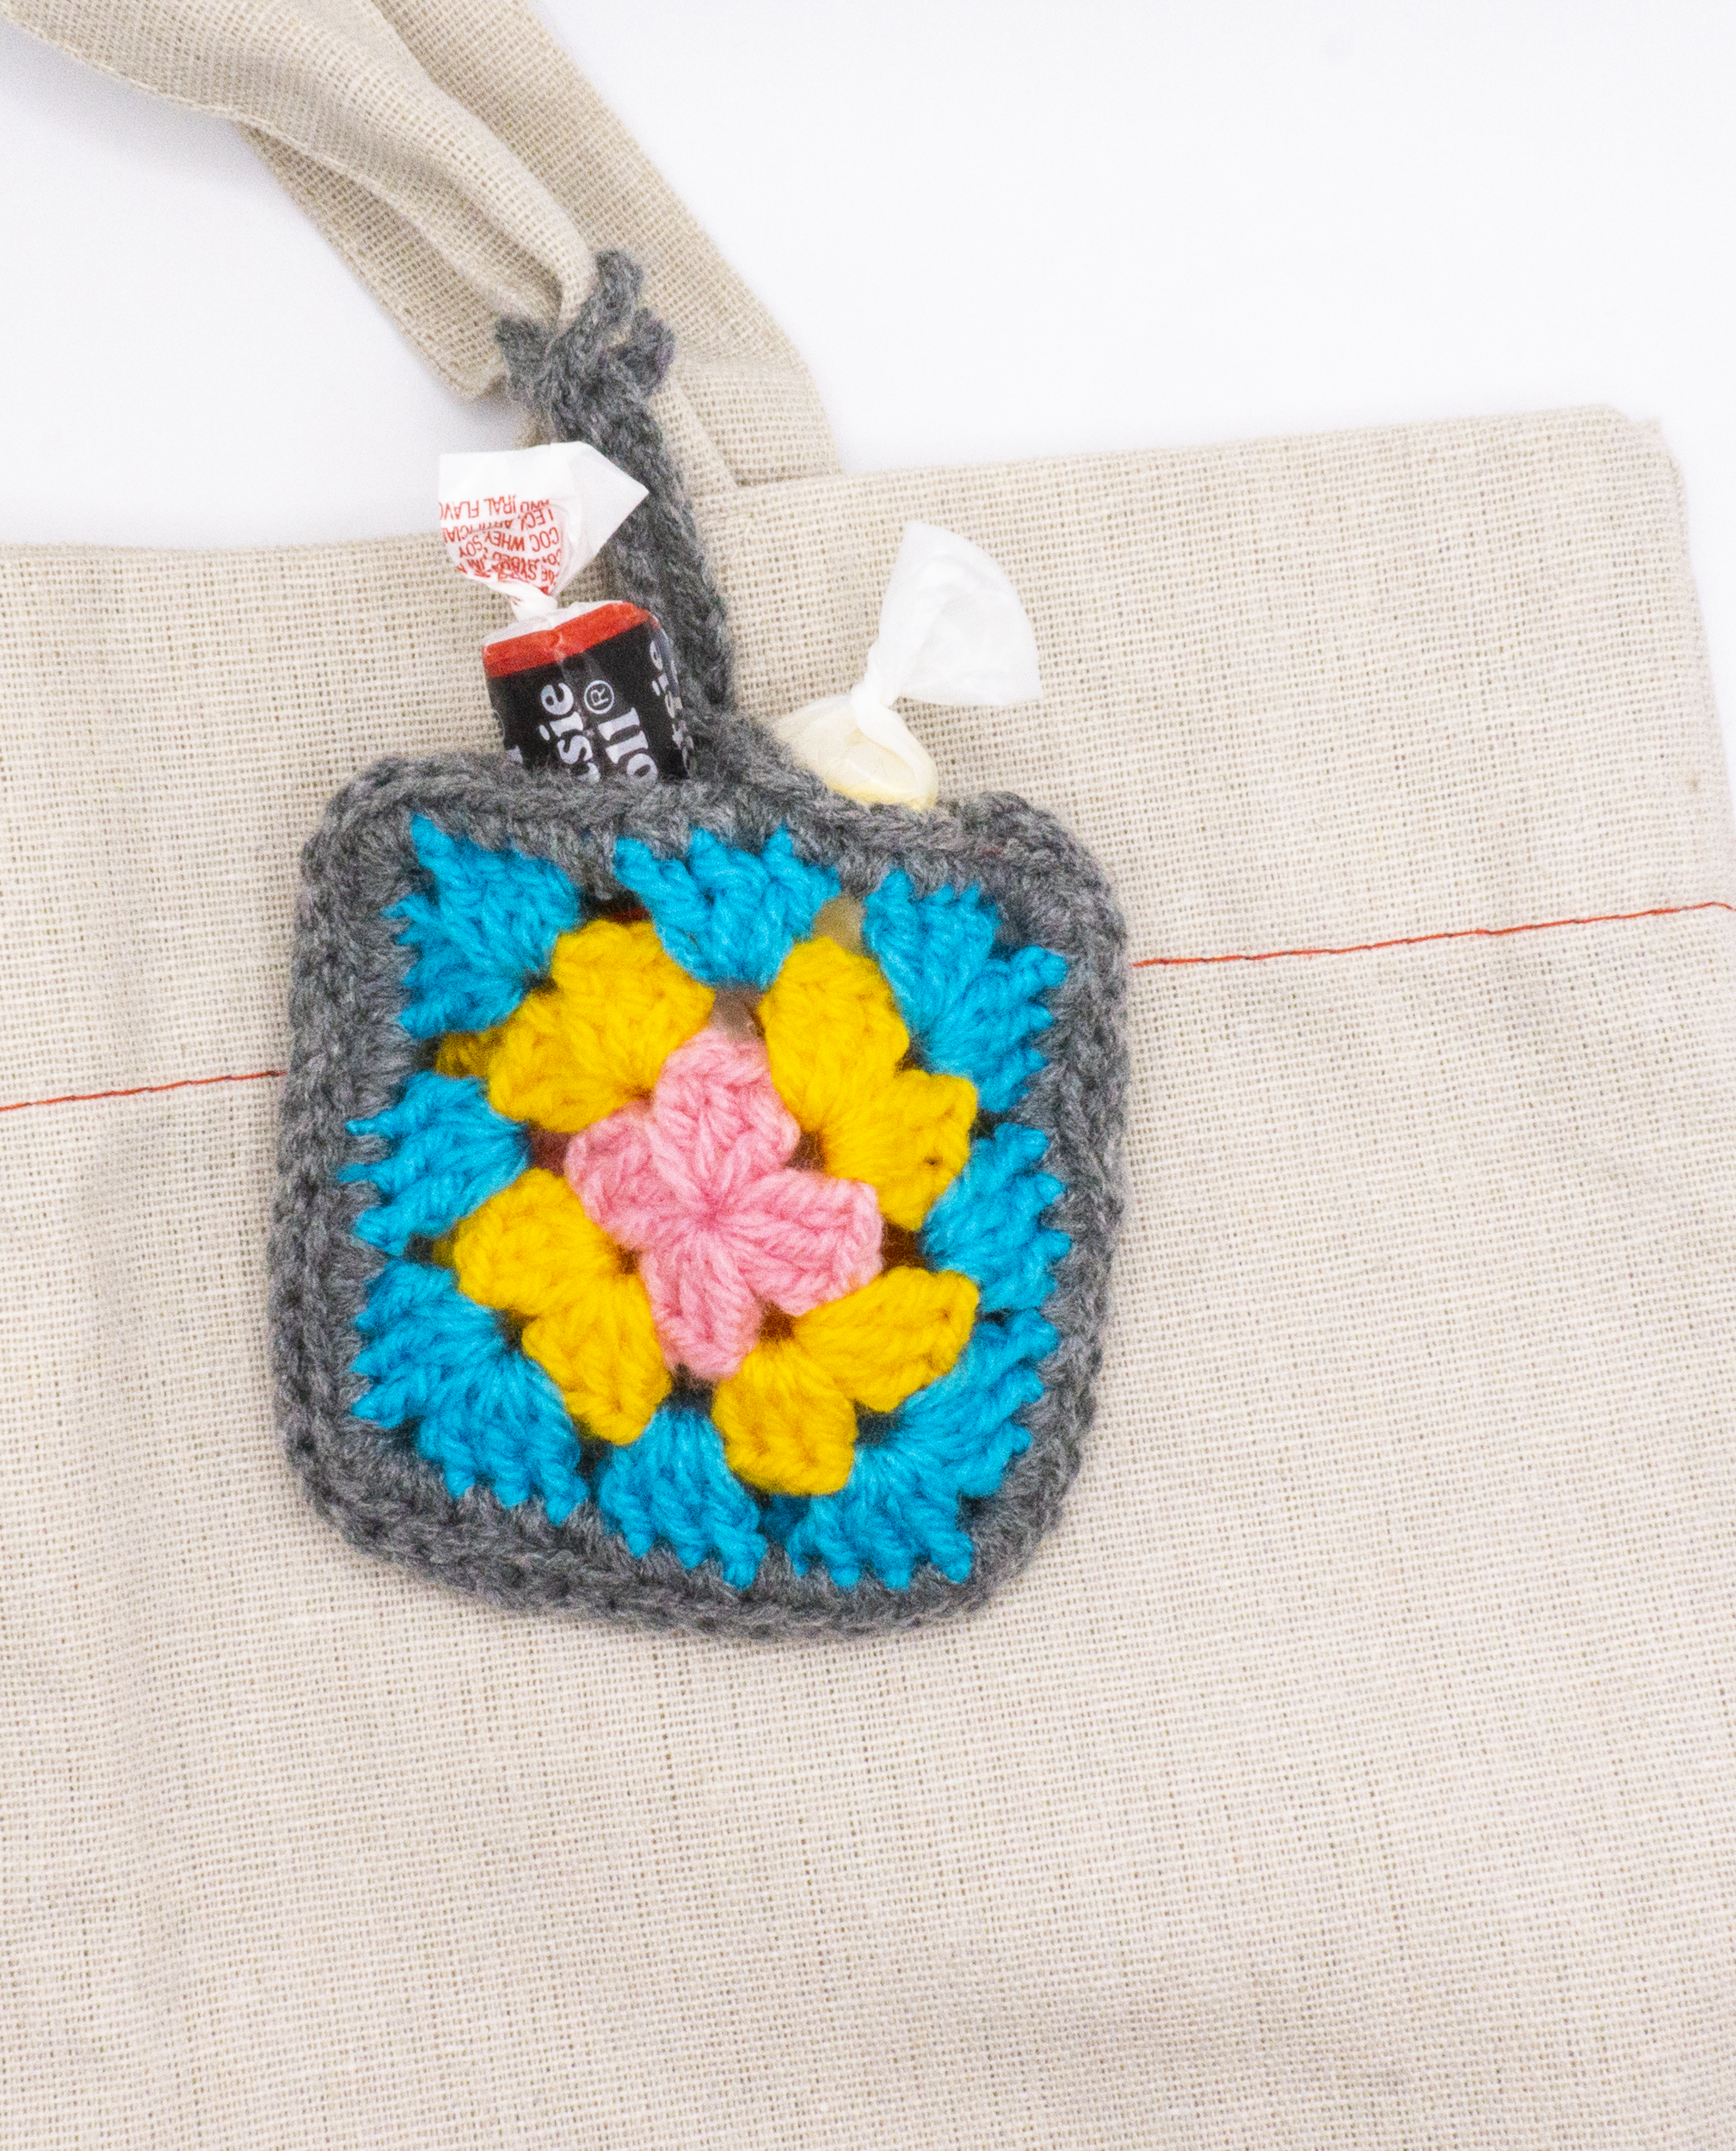
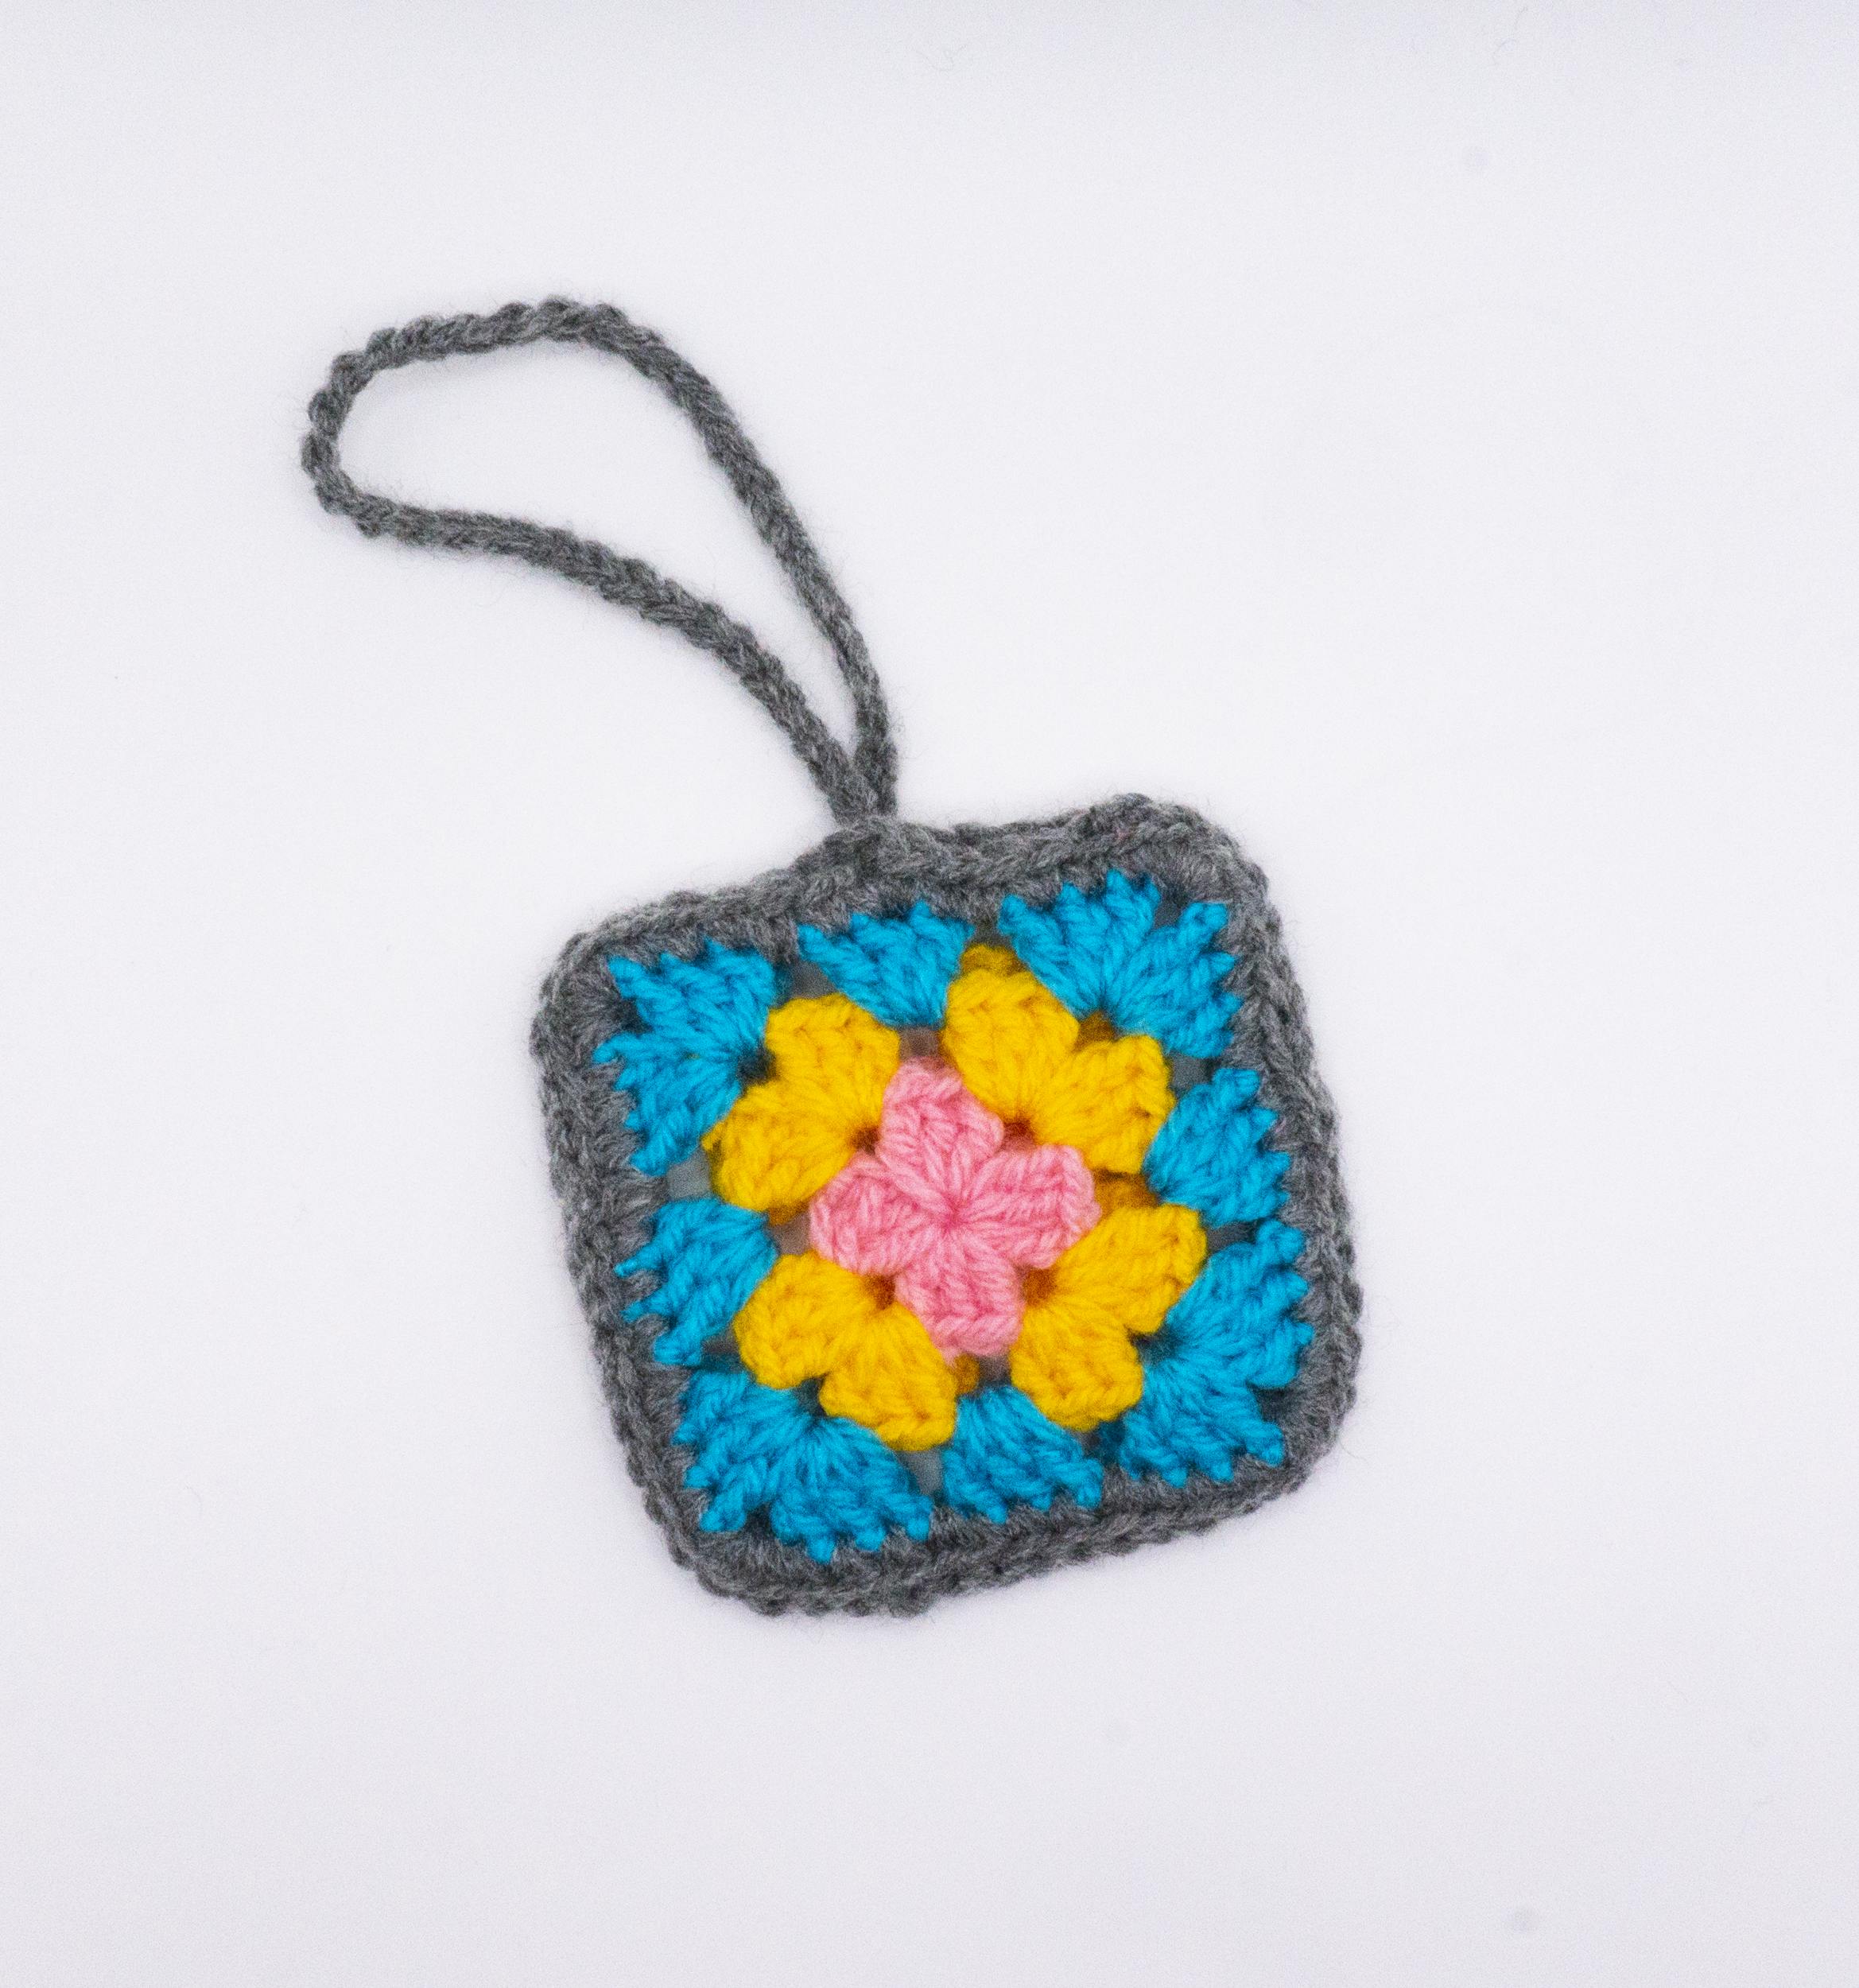
Crochet Granny Square Bag Charm Pouch Pattern – FREE PATTERN
Hello!
Happy first week of Spring in the northern hemisphere!
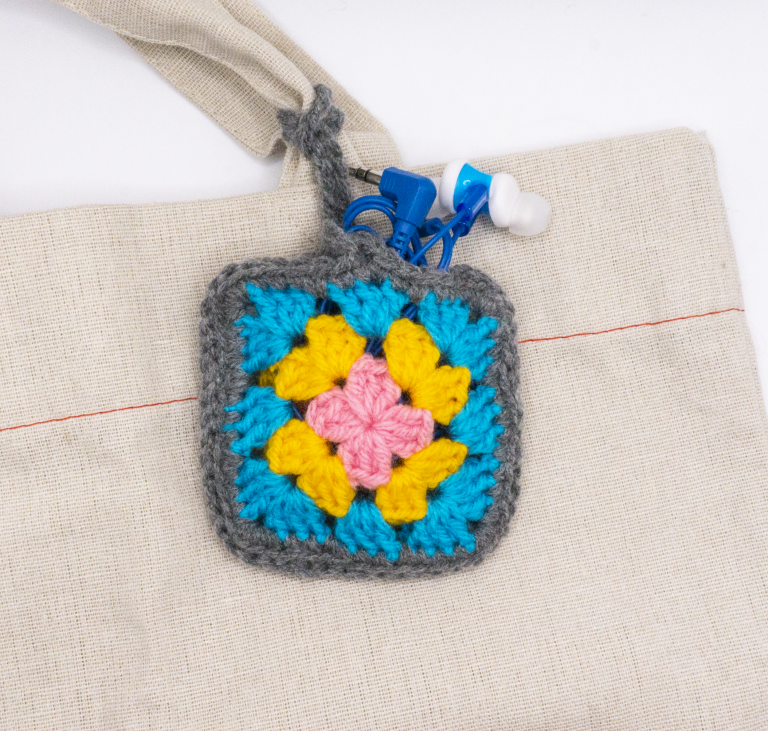
I have been busy creating video tutorials for some of my older written patterns on this blog recently, but I am back with a new pattern! It is a simple granny square bag charm pouch that you can use all your scrap yarn for!
You can also check out my updated blog posts with the video tutorials here:
Tulip Easter Egg Basket
Egg and Tulip Appliques
Baby Socks
Baby Mittens
Let’s start!
Note: Some of the items on my blog have affiliate links where I earn a small percentage from the purchase of the item. Thank you for your support!
Table of Contents
Materials: Bag Charm Pouch
3.25 mm (D) Crochet Hook
DK Yarn – I used Patons Astra
Tapestry Needle
A Pair of Scissors
Note: The numbers in the brackets represent the number of stitches in each row
Abbreviations
CH – Chain
SLST – Slip Stitch
SC – Single Crochet (DC in UK terms)
DC – Double Crochet (TR in UK terms)
YO – Yarn Over
SK – Skip
ST(s) – Stitch(es)
FO – Finish Off
Pattern: Bag Charm Pouch
Round 1: Chain 3 (counts as a DC), DC two more times in 3rd CH from hook,
CH 2, 3 DC, CH 2, 3 DC, CH 2, 3 DC, CH 2, SLST to beginning CH. FO.
Attach new colour in corner CH 2.
Round 2: CH 2 (counts as DC), DC two more times in previous CH 2 space, CH 2, 3 DC in same space. *CH 1. 3 DC in next CH 2 space. CH 2. 3 DC in same space.* Repeat 2 more times. CH 2. SLST in beginning CH. FO.
Attach new colour in corner CH 2.
Round 3: CH 2 (counts as DC), DC two more times in previous CH 2 space, CH 2, 3 DC in same space. *CH 1. 3 DC in next CH 1 space. CH 1. 3 DC in next CH 2 space. CH 2. 3 DC in same space.* Repeat 2 more times. CH 1. 3 DC in next CH 2 space. CH 2. SLST in beginning CH. FO.
Attach new colour in any ST.
Border: SC in each DC and each CH 1 space of the granny square. Make 3 SC for the corners. Repeat around for three of the sides.
For 1st granny square, on the last side of border.
SC until you reach the middle DC of the side. SC into it and then CH 50.
SC into the same ST and till end of round.FO with invisible FO.
For 2nd granny square, on the last side of border.
SC until you reach the middle DC of the side. CH 2. SK one ST. SC till end of round.
FO with invisible FO.
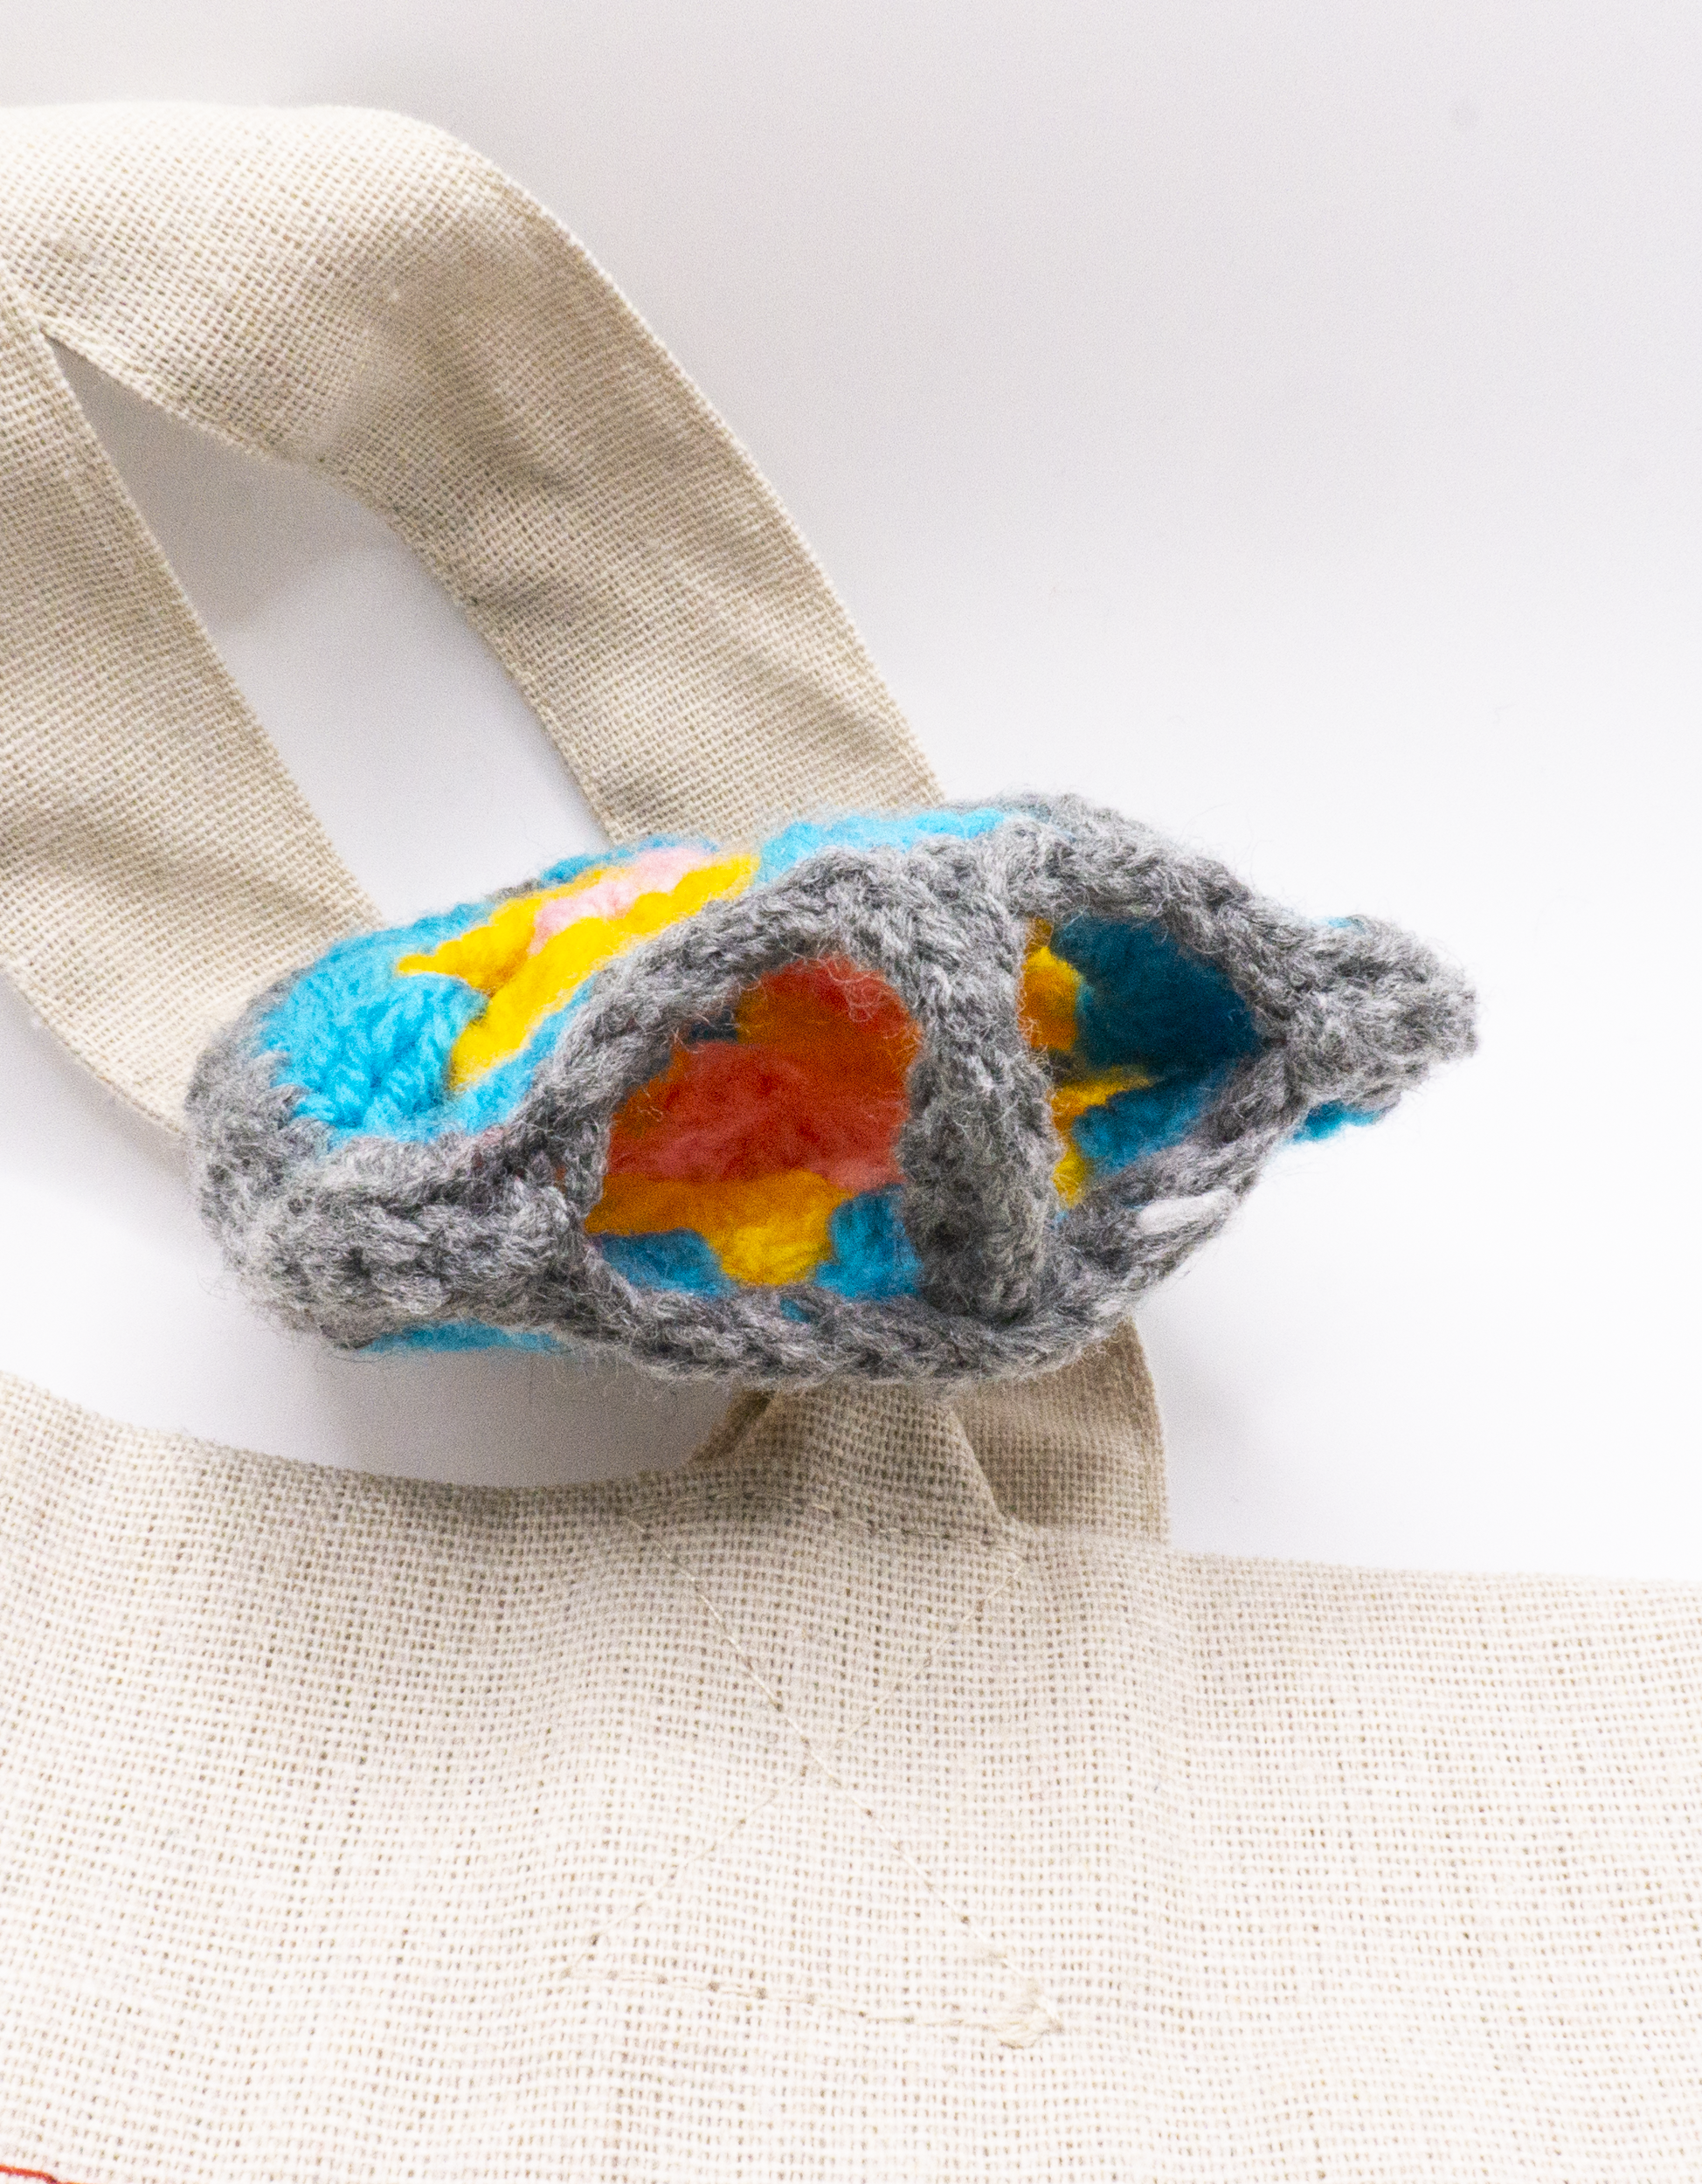
Putting it together: Hold the two squares together with the right side facing out. Attach yarn in the 2nd DC of the last cluster of the left side of the piece where the loop and opening are.
SLST in back loop of both pieces around. Finish at the 2nd DC of the last cluster on the right side of the piece where the loop and opening are. FO.
Here is the video tutorial with subtitles:
Video Tutorial:
Granny Square Bag Charm Pouch Complete!
Comment below with any questions you may have!
Happy crocheting!
Jess Crafting
Pattern for personal use only. Feel free to sell the completed Granny Square Bag Charm though! Please link back to my blog or my channel.
#jesscrafting