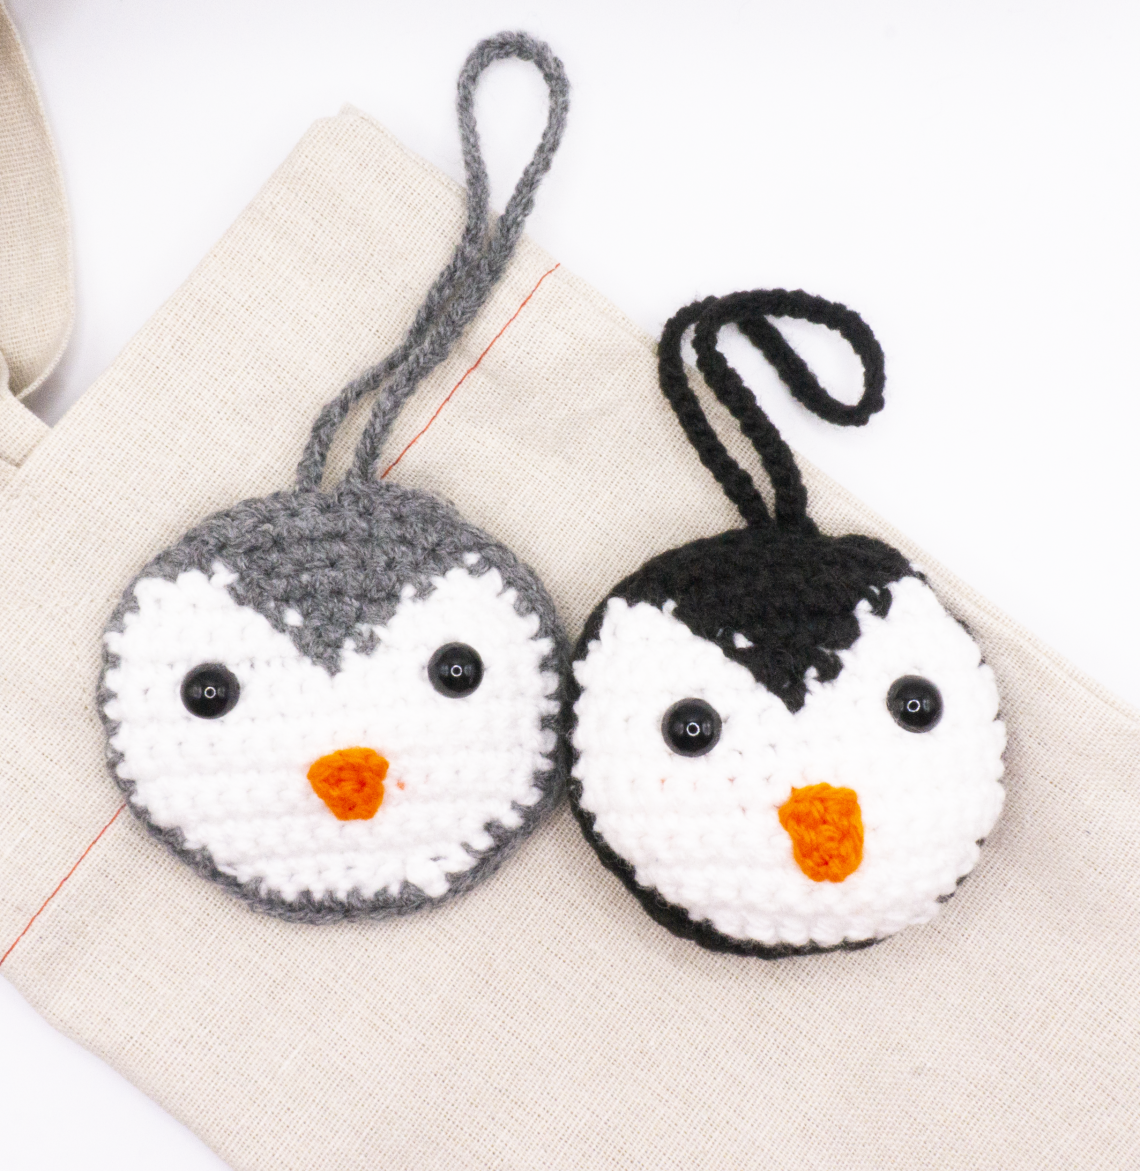
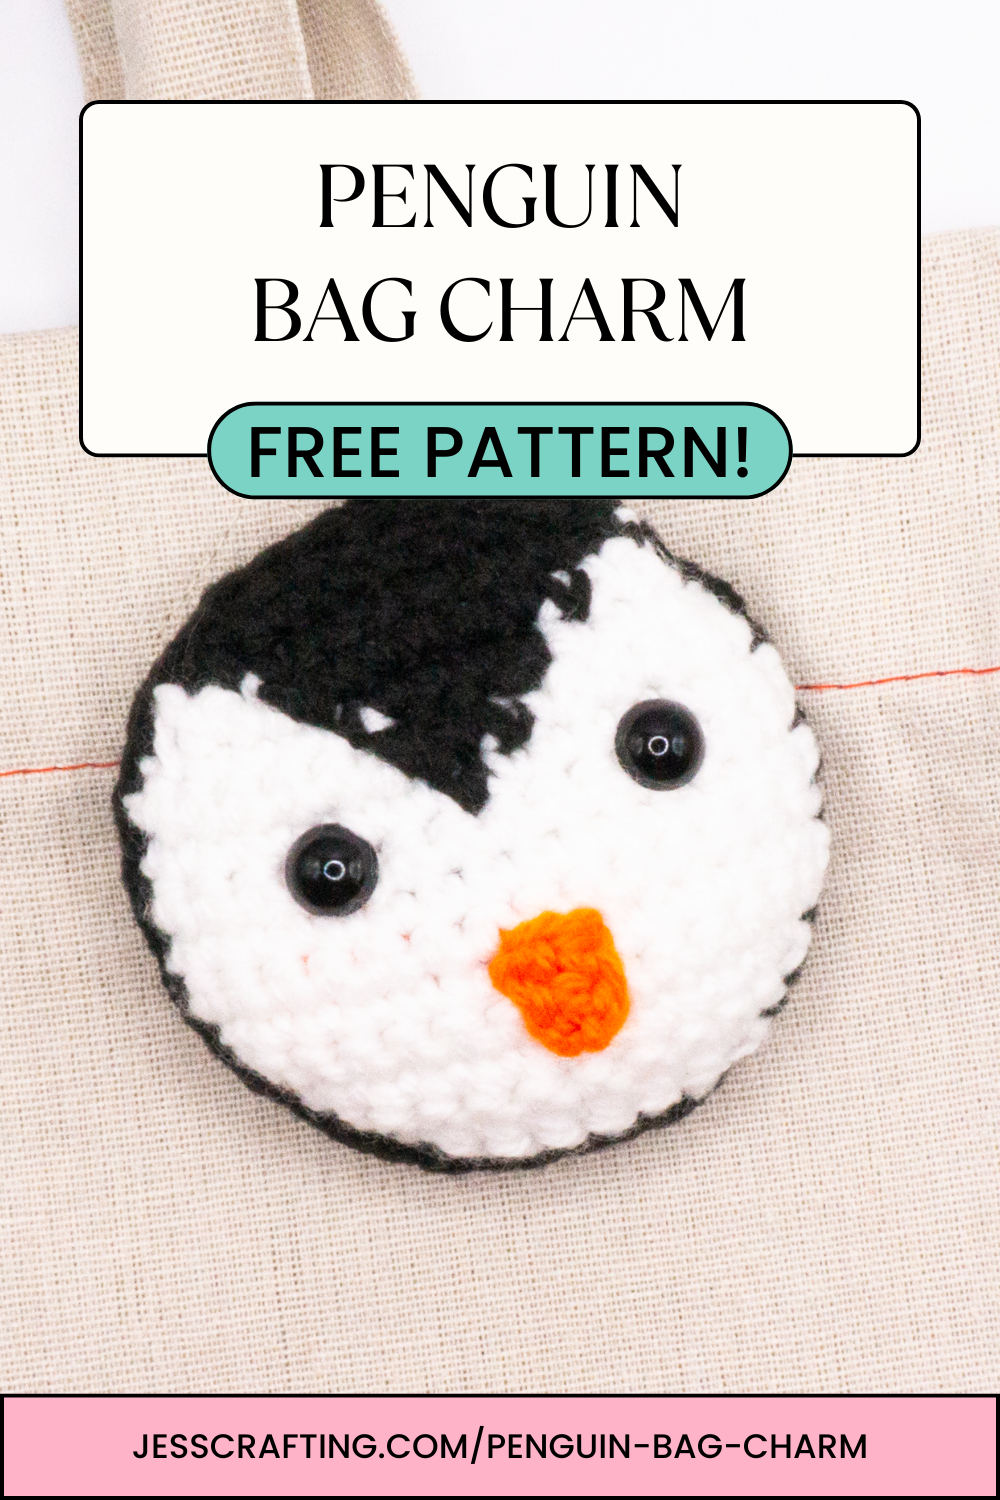
Crochet Penguin Bag Charm – Free Pattern
Hello!
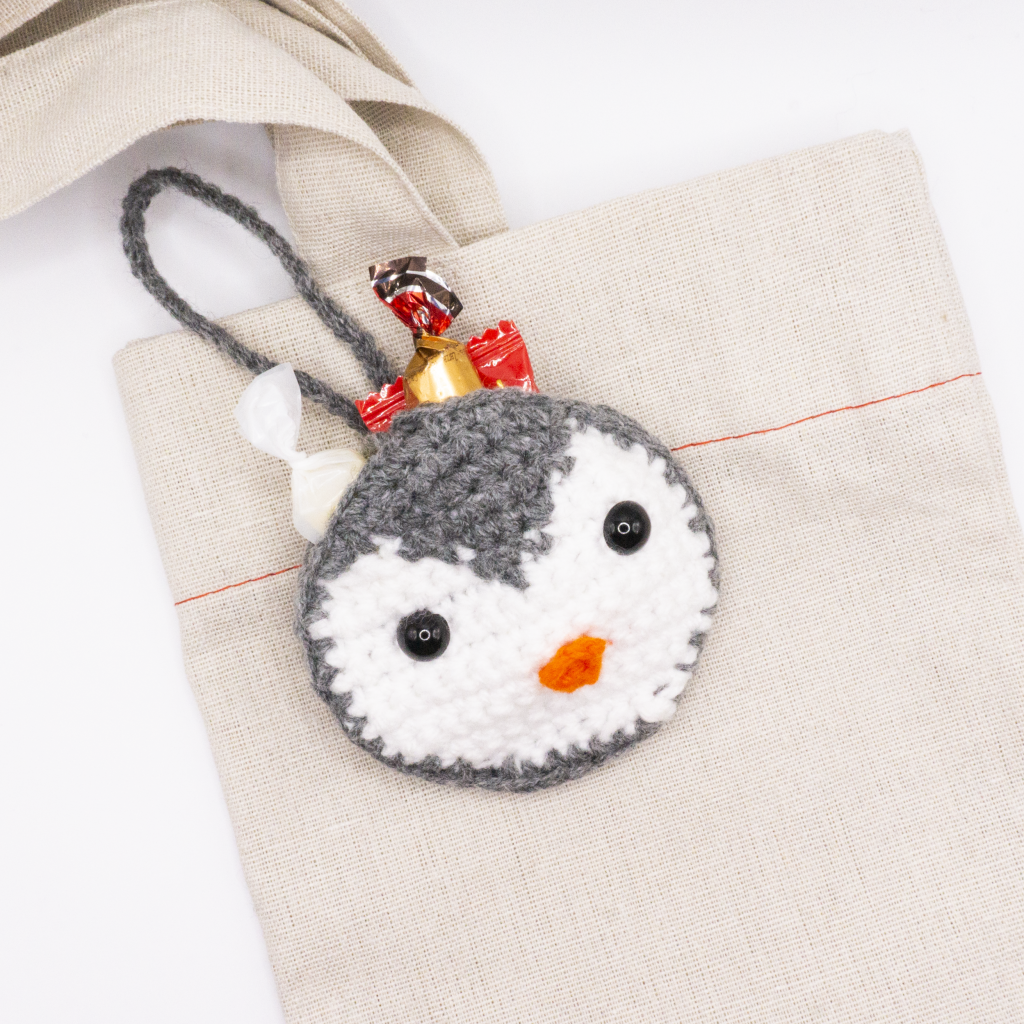
After a couple of weeks of baby patterns, I thought I would switch back to a bag charm pattern, but adding a pouch option. The penguin bag charm also uses safety eyes, but you can sew them on or use felt fabric to make them as well.
Let’s start!
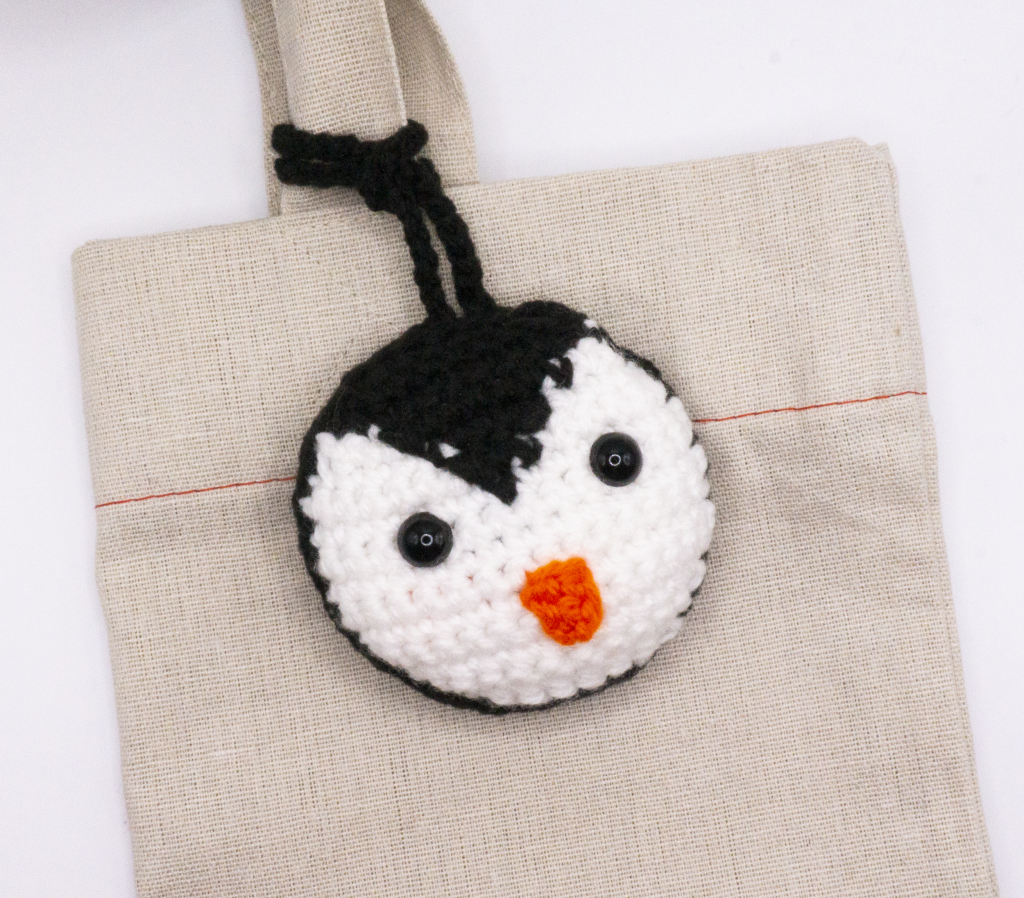

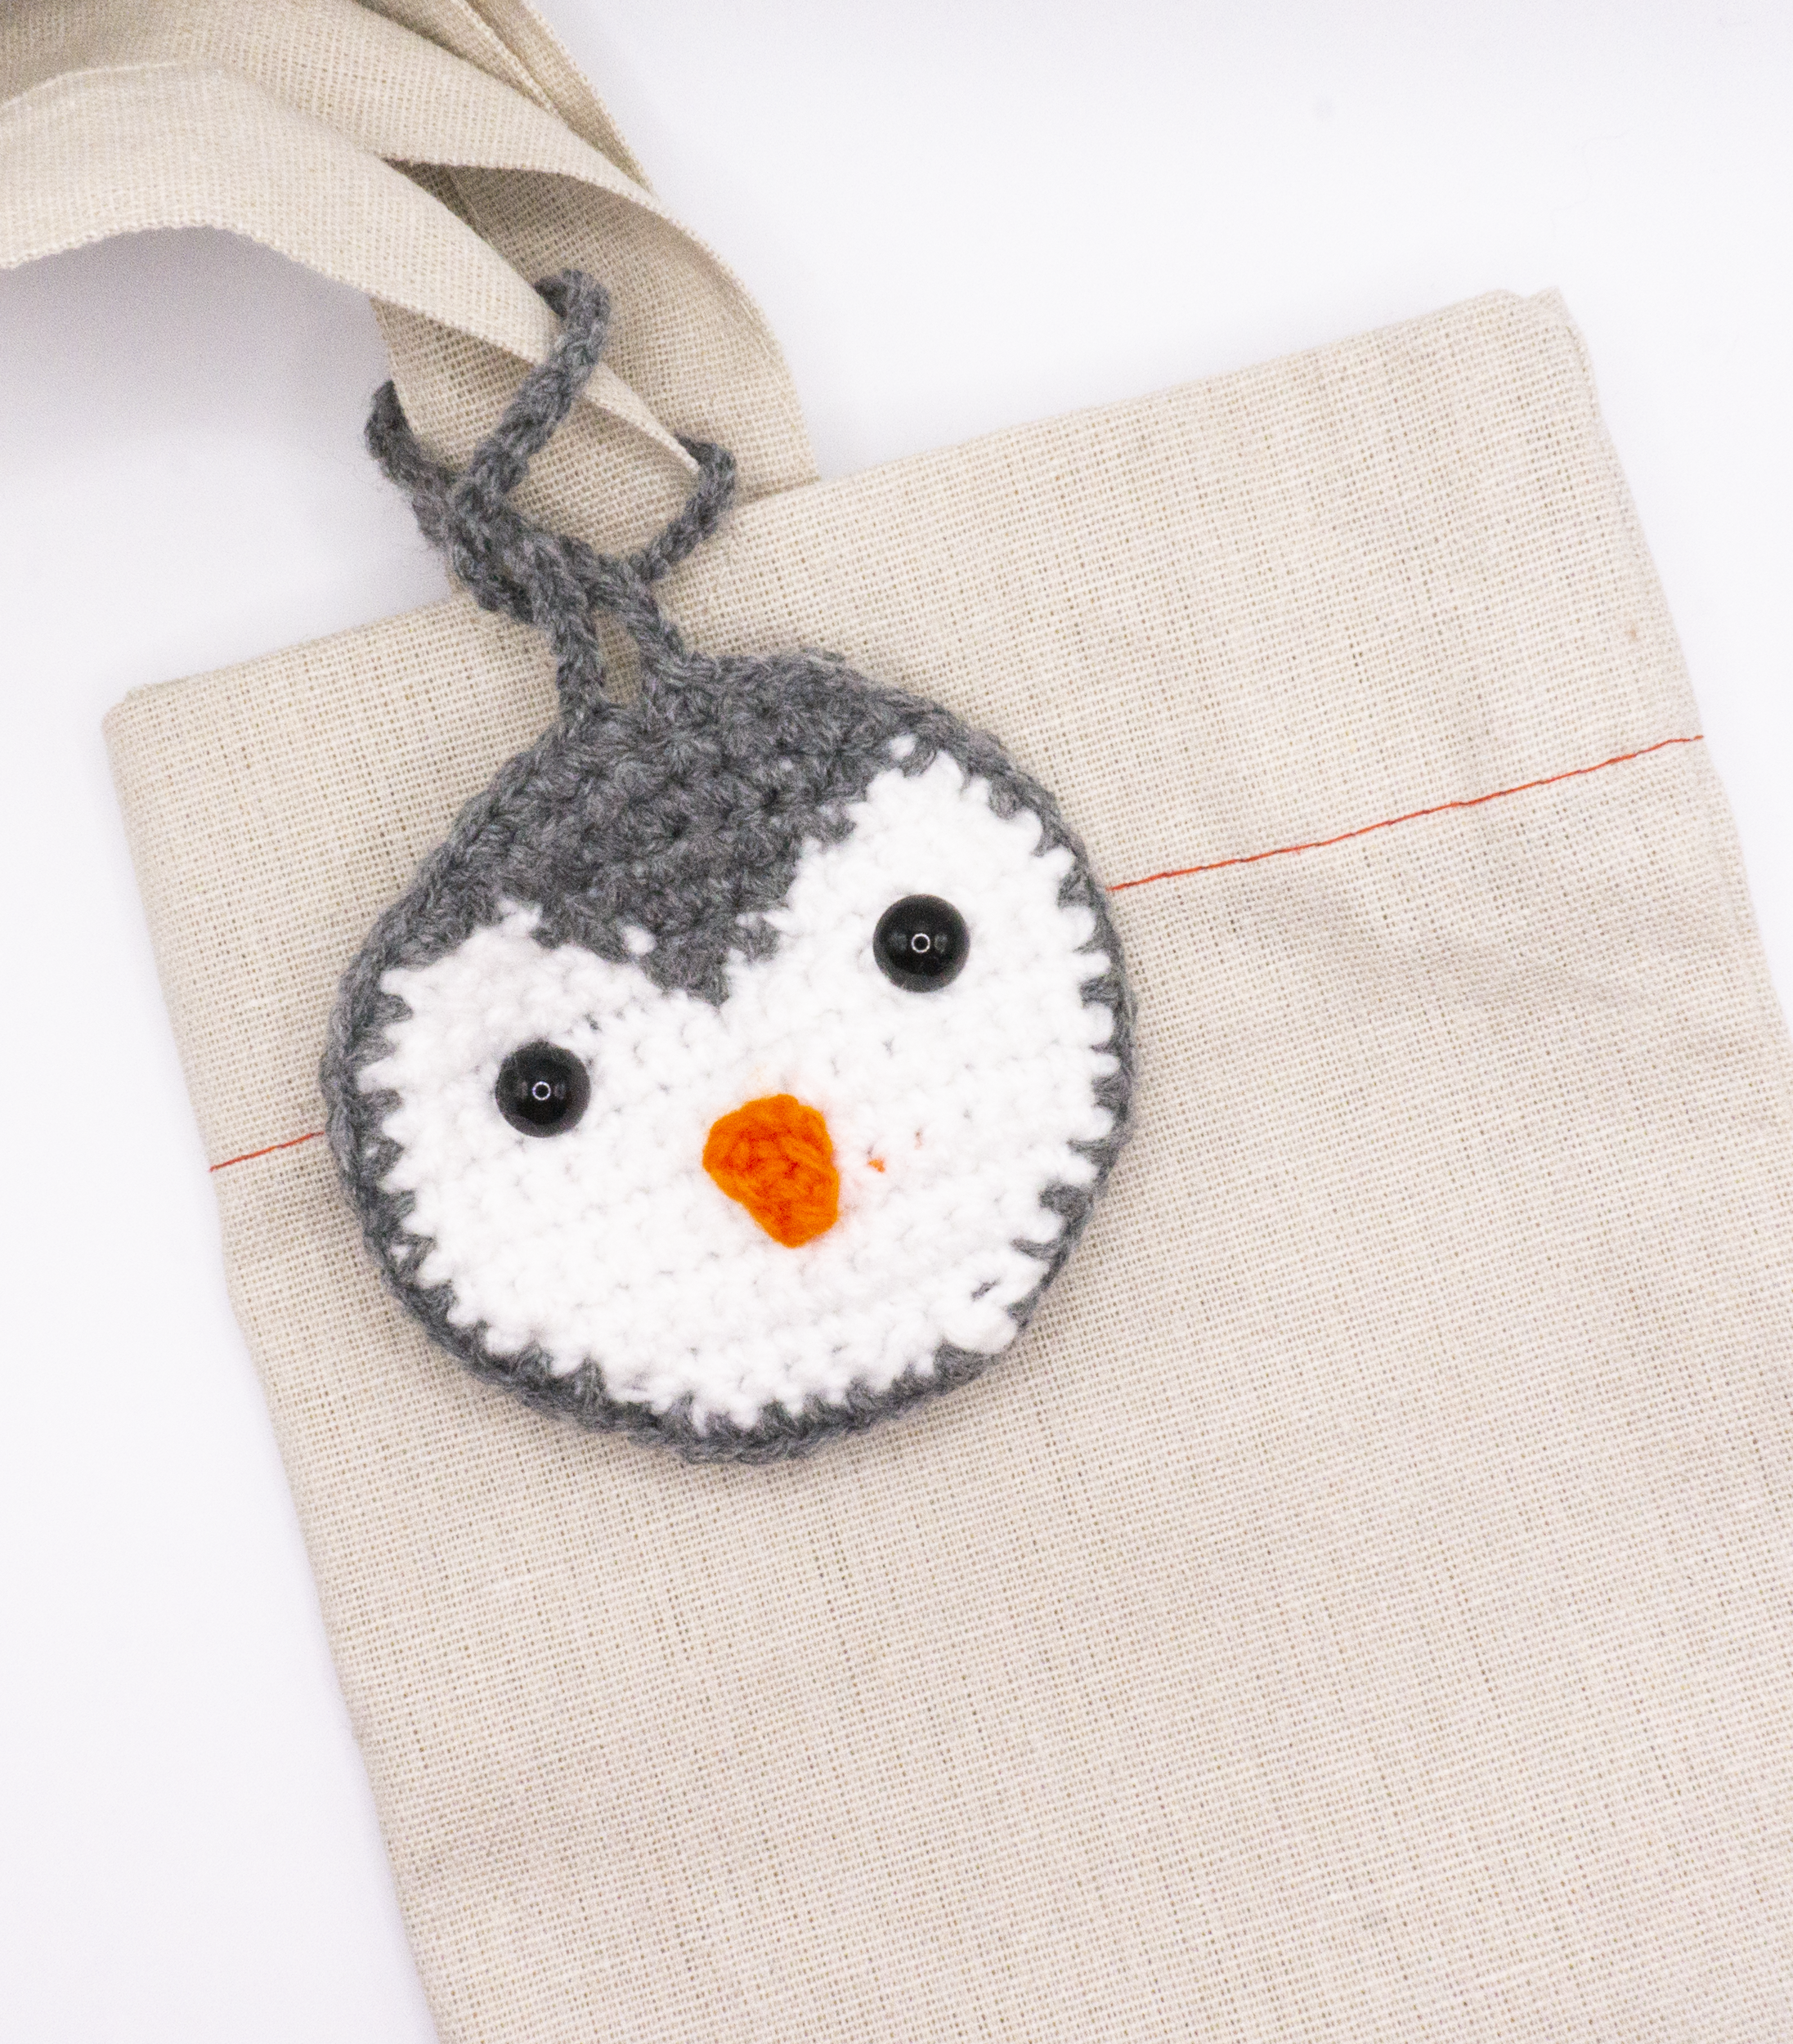
Table of Contents
Materials: Penguin Bag Charm
3.00 mm Crochet Hook
DK Weight Yarn
Tapestry Needle
10 mm Safety Eyes
A Pair of Scissors
Stitch Marker
Note: The numbers in the brackets represent the number of stitches in each round.
Abbreviations
CH – Chain
SC – Single Crochet (DC in UK terms)
SC2TOG – Single Two Stitches Together (DC2TOG in UK terms)
CC – Change Colour
SK – Skip
SLST – Slip Stitch
ST(s) – Stitch(es)
FO – Finish Off
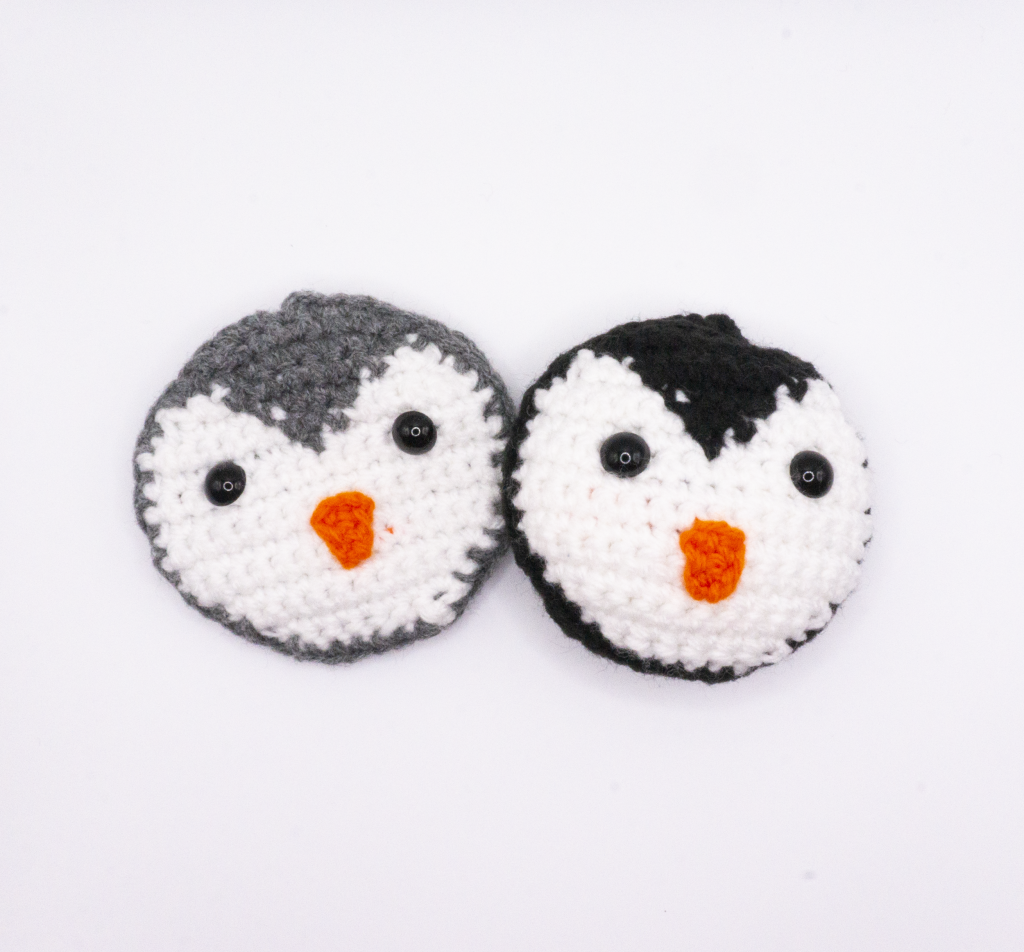
Pattern: Penguin Bag Charm
Face – CH 8.
Row 1: SC in 2nd CH from hook and down row. Turn. (7)
Row 2: CH 1. SC 2 in first, SC in next 5, SC 2 in last. (9)
Row 3: CH 1. SC 2 in first, SC in next 7, SC 2 in last. (11)
Row 4: CH 1. SC 2 in first, SC in next 9, SC 2 in last. (13)
Row 5: CH 1. SC 2 in first, SC in next 11, SC 2 in last. (15)
Row 6 – 9: CH 1. SC in each ST across. Turn. (15)
Row 10: CH 1. SC in 7. Change colour. SC 1. CC. SC 7. Turn. (15)
Row 11: CH 1. SC in 6. Change colour. SC 3. CC. SC 6. Turn. (15)
Row 12: CH 1. SC2TOG. SC in 3. Change colour. SC 5. CC. SC 3. SC2TOG. Turn. (13)
Row 13: CH 1. SC2TOG. SC in 1. Change colour. SC 7. CC. SC 1. SC2TOG. CC. Turn. (11)
Row 14: CH 1. SC2TOG. SC in 7. SC2TOG. Turn. (9)
Row 15: CH 1. SC2TOG. SC in 5. SC2TOG. Turn. (7)
Continue to border section.
Beak – CH 3.
Row 1: SC in 2nd CH from hook and down row. Turn. (2)
Row 2: CH 1. SC2TOG (1)
FO. Leave tail for sewing. Sew the beak between Rows 4 – 6.
Back – CH 8.
Row 1: SC in 2nd CH from hook and down row. Turn. (7)
Row 2: CH 1. SC 2 in first, SC in next 5, SC 2 in last. (9)
Row 3: CH 1. SC 2 in first, SC in next 7, SC 2 in last. (11)
Row 4: CH 1. SC 2 in first, SC in next 9, SC 2 in last. (13)
Row 5: CH 1. SC 2 in first, SC in next 11, SC 2 in last. (15)
Row 6 – 11: CH 1. SC in each ST across. Turn. (15)
Row 12: CH 1. SC2TOG. SC in 11. SC2TOG. Turn. (13)
Row 13: CH 1. SC2TOG. SC in 9. SC2TOG. Turn. (11)
Row 14: CH 1. SC2TOG. SC in 7. SC2TOG. Turn. (9)
Row 15: CH 1. SC2TOG. SC in 5. SC2TOG. Turn. (7)
Continue to border section.
Border for stuffed face piece: CH 1. SC around. (42)
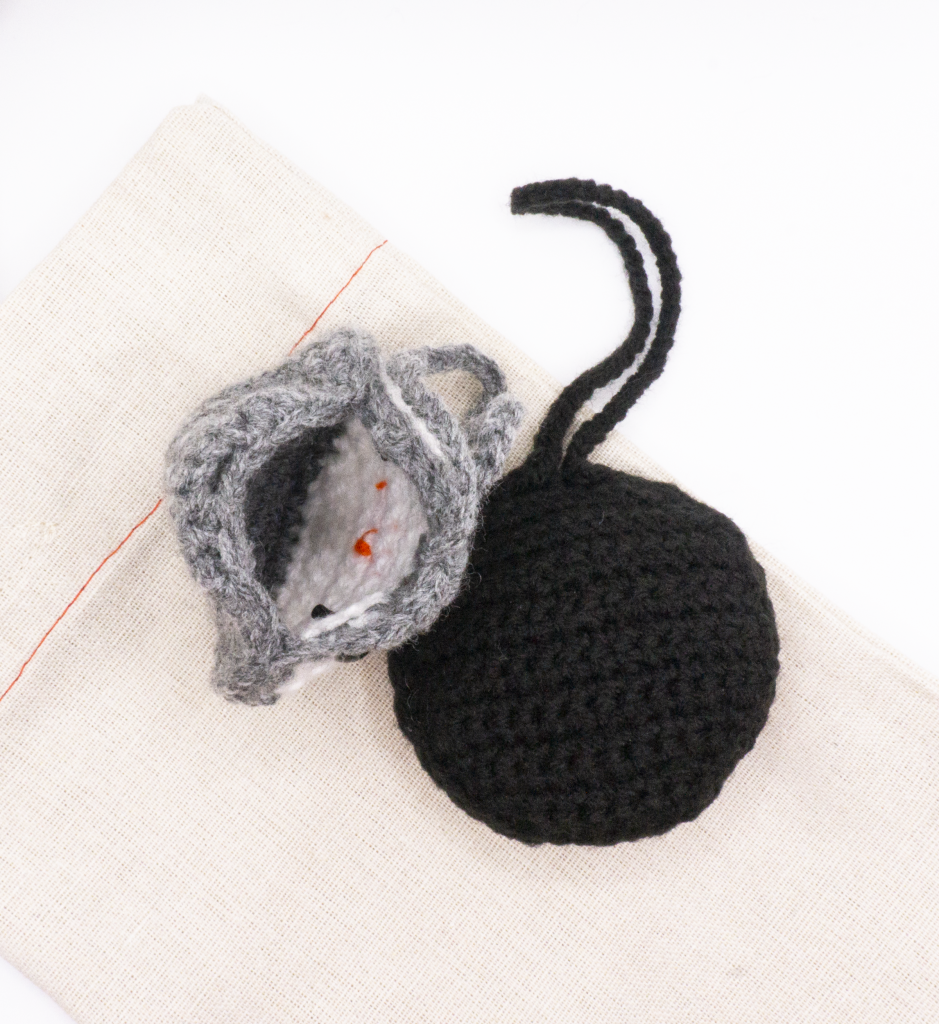
Border for stuffed back piece: CH 1. SC 4. CH 50. SC in same ST as 4th SC. SC around. (43) Leave long tail for sewing.
Border for pouch face piece: CH 1. SC 4. CH 50. SC in same ST as 4th SC. SC around. (43)
Border for pouch back piece: CH 1. SC 2. CH 2. SK 3. SC around. (39) Leave long tail for sewing.
When sewing the pouch, leave the space for the after Row 13 unsewn. Or however large you want the opening to be.
Eyes – Place them between Rows 9 – 10 and four STs to the left and right of the colour change from Row 10.
Here is the video tutorial with subtitles:
Video Tutorial:
Penguin Bag Charms Complete!
Let me know if you try this pattern out and if you have any questions.
Happy crafting!
Jess Crafting/Jess Crafting’s Cottage
Pattern for personal use only. Feel free to sell the completed Penguin Bag Charm though! Please link back to my blog or my channel.
#jesscrafting #jesscraftingscottage