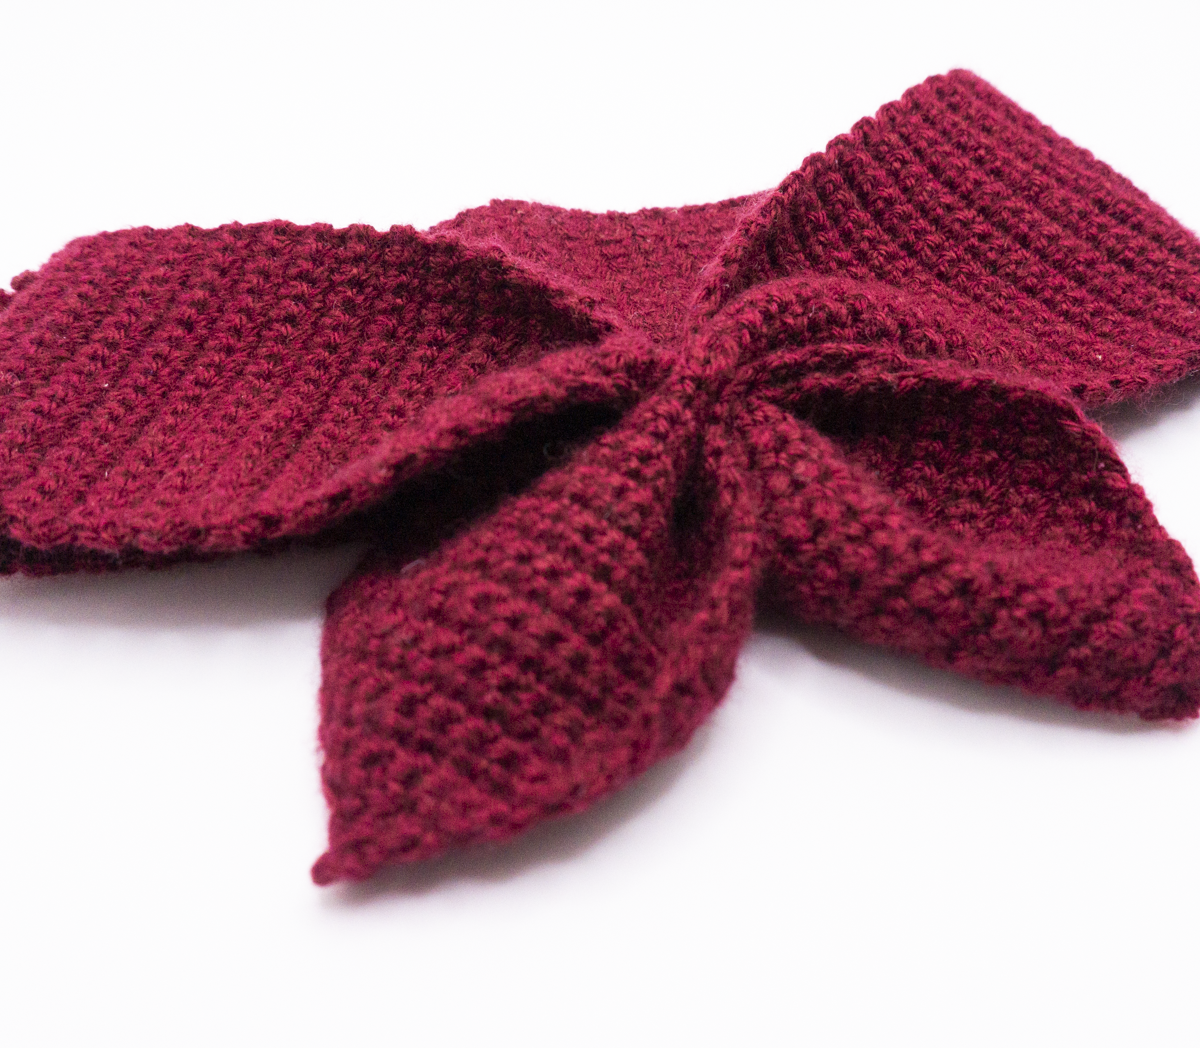
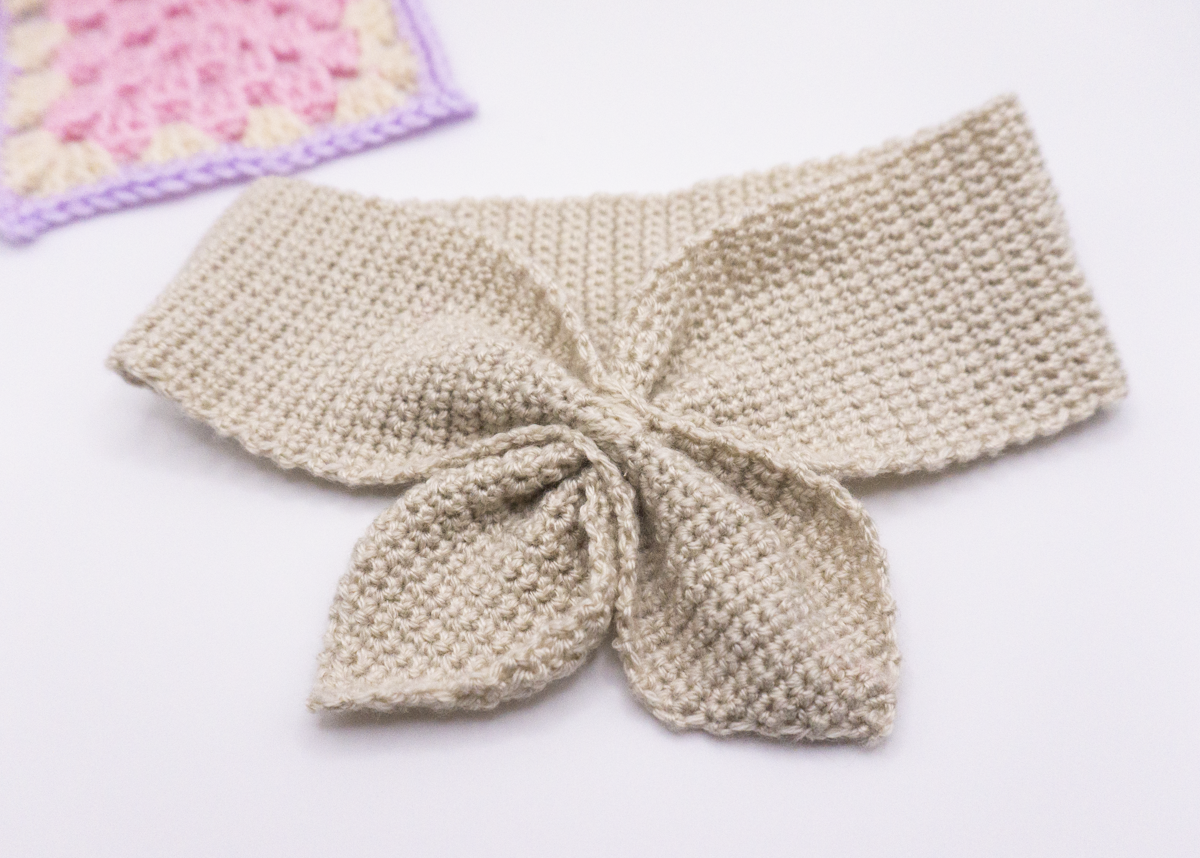
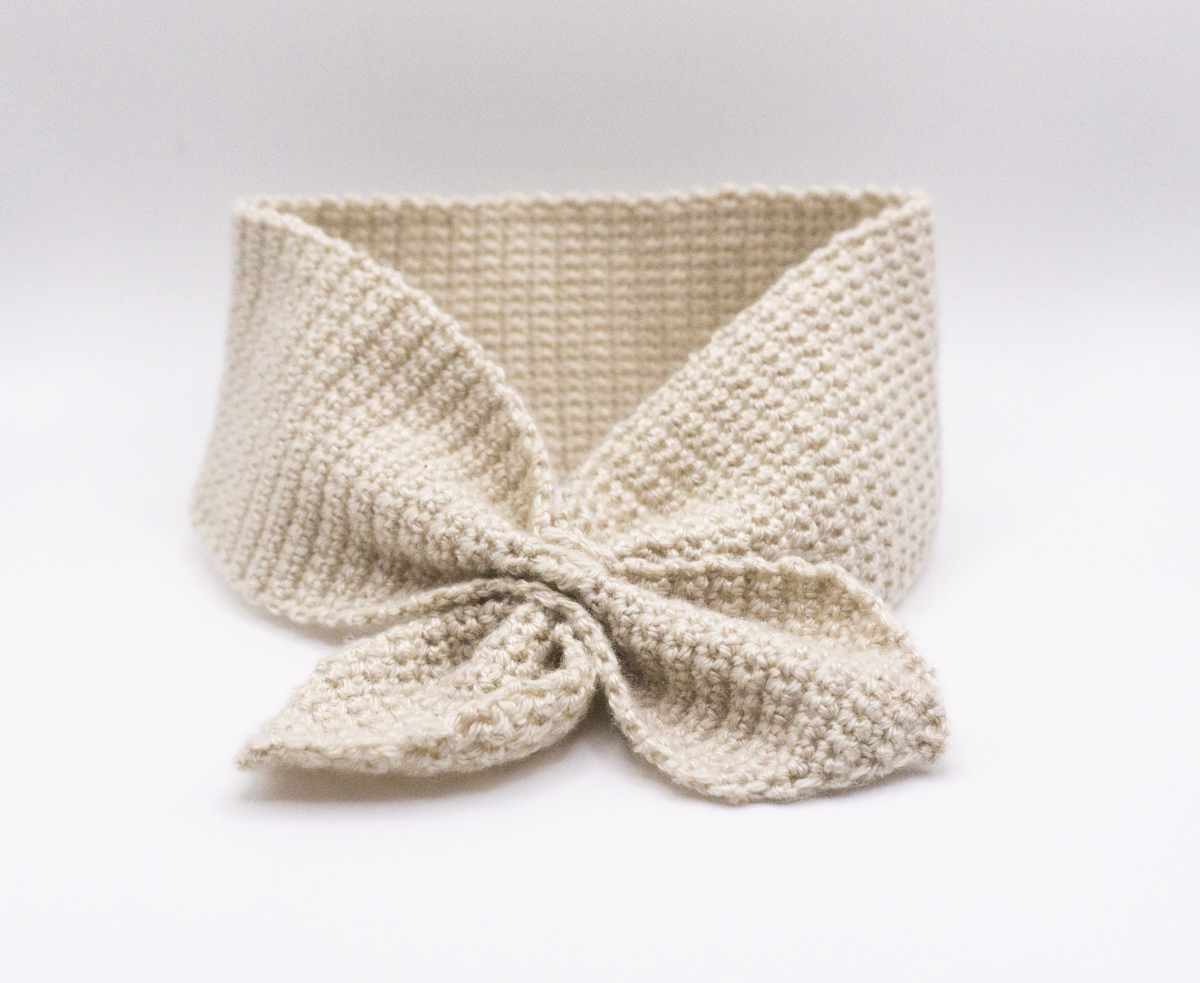
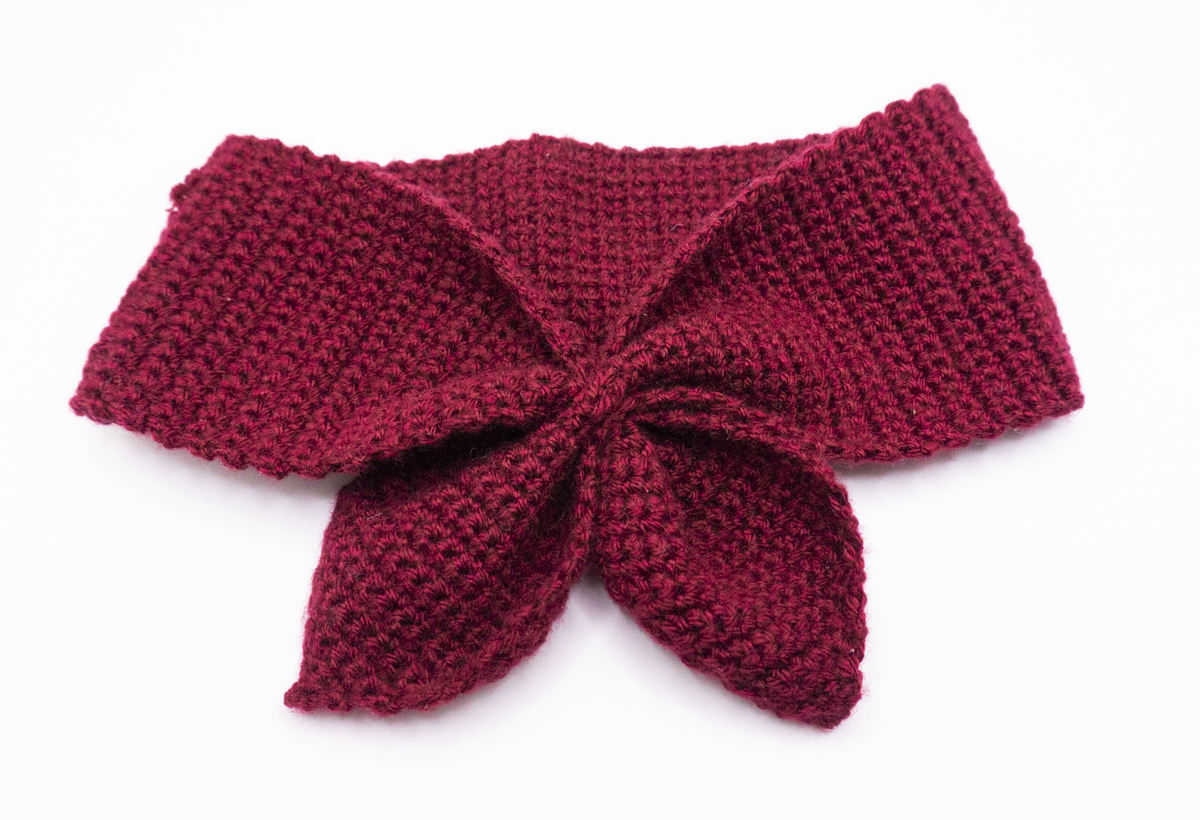
Easy Crochet Neckerchief – Free Pattern
Hi everyone!
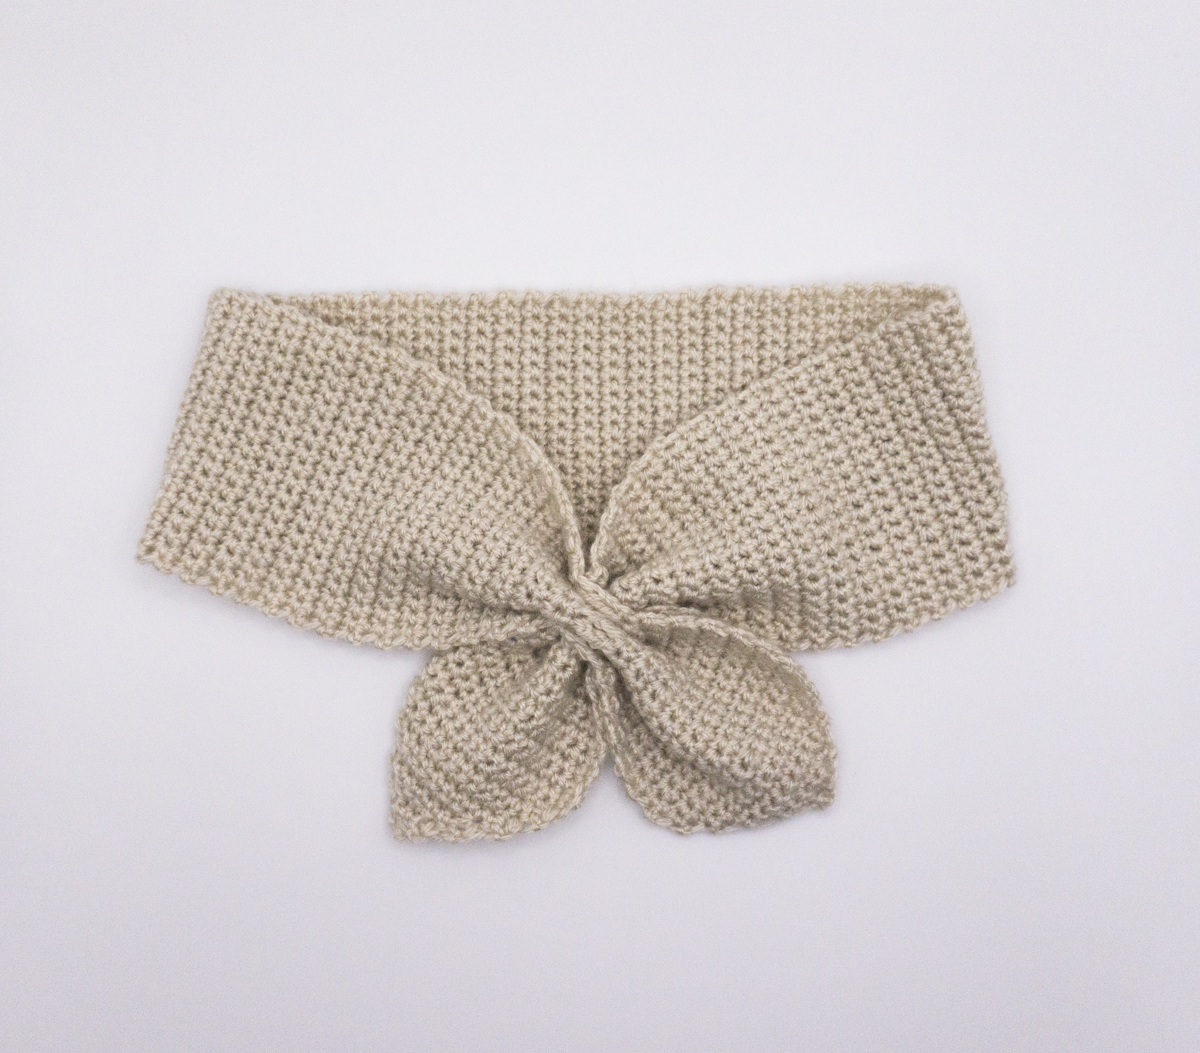
I have always loved the look of the bow tie scarves since I was a child and have made many of the knitted bow tie scarves from Bev’s The Make It Your Own Zone blog. That is why I wanted to try making a neckerchief using crochet and some lace yarn that I still have loads of.
This is a simple pattern and the finished neckerchief looks quite cute!
Let’s get started!
Note: Some of the items on my blog have affiliate links where I earn a small percentage from the purchase of the item. Thank you for your support!
Table of Contents

Materials: Neckerchief
2.50 mm Crochet Hook
Lace Weight Yarn
Tapestry Needle
A Pair of Scissors
Note: The numbers in the brackets represent the number of stitches in each row.
Abbreviations
CH – Chain
SC – Single Crochet (DC in UK terms)
ST – Stitch
SC2TOG – Single Crochet 2 Stitches Together
SK – Skip
TR – Treble Crochet (DTR in UK Terms)
FO – Finish Off
Pattern: Neckerchief
Chain 2.
Row 1: SC in 2nd Chain from hook. Turn. (2)
Row 2: CH 1. SC 2 in each. Turn. (4)
Row 3: CH 1. SC 2 in 1st ST. SC in next 2. SC 2 in last ST. Turn. (6)
Row 4: CH 1. SC 2 in 1st ST. SC in next 4. SC 2 in last ST. Turn. (8)
Row 5: CH 1. SC 2 in 1st ST. SC in next 6. SC 2 in last ST. Turn. (10)
Row 6: CH 1. SC 2 in 1st ST. SC in next 8. SC 2 in last ST. Turn. (12)
Row 7: CH 1. SC 2 in 1st ST. SC in next 10. SC 2 in last ST. Turn. (14)
Row 8: CH 1. SC 2 in 1st ST. SC in next 12. SC 2 in last ST. Turn. (16)
Row 9: CH 1. SC 2 in 1st ST. SC in next 14. SC 2 in last ST. Turn. (18)
Row 10 – 21: CH 1. SC across. Turn. (18)
Row 22: CH 2. DC in same. CH 2, SK 2, DC in next two, CH 2, SK 2, DC in next four, SK 2, CH 2, DC in next two, CH 2, SK 2, DC in last ST. Turn. (10)
*For bigger hole do TBR instead of DC and CH 3 at the beginning*
Row 23: CH 1. SC in same, SC 2 in CH 2 space, SC in next two, SC 2 in CH 2 space, SC in next four, SC 2 in CH 2 space, SC in next two, SC 2 in CH 2 space, SC in last ST. Turn. (18)
Row 24 – 143: CH 1. SC across. Turn. (18) (or until piece measures 16 in/40 cm from the chain 2 spaces row) *you can add or remove rows to make the neckerchief shorter or longer*
Row 144: CH 1. SC2TOG in 1st 2 STs. SC in next 14. SC2TOG in last 2 STs. Turn. (16)
Row 145: CH 1. SC2TOG in 1st 2 STs. SC in next 12. SC2TOG in last 2 STs. Turn. (14)
Row 146: CH 1. SC2TOG in 1st 2 STs. SC in next 10. SC2TOG in last 2 STs. Turn. (12)
Row 147: CH 1. SC2TOG in 1st 2 STs. SC in next 8. SC2TOG in last 2 STs. Turn. (10)
Row 148: CH 1. SC2TOG in 1st 2 STs. SC in next 6. SC2TOG in last 2 STs. Turn. (8)
Row 149: CH 1. SC2TOG in 1st 2 STs. SC in next 4. SC2TOG in last 2 STs. Turn. (6)
Row 150: CH 1. SC2TOG in 1st 2 STs. SC in next 2. SC2TOG in last 2 STs. Turn. (4)
Row 151: CH 1. SC2TOG in 1st 2 STs. SC2TOG in last 2 STs. Turn. (2)
Row 152: CH 1. SC2TOG. FO.
Here is the video tutorial for the neckerchief:
Video Tutorial: Neckerchief
This crochet neckerchief pattern is the perfect project to start with after you have learned some basic stitches of crochet and turns out quite nice. I have made two already and will be making more soon!
Let me know in the comments if you have any problems with your neckerchief project.
Here is another crochet scarf that I made a while back, the scalloped edged infinity scarf.
Jessica
Pattern for personal use only. Feel free to sell the completed neckerchief though! Please link back to my blog or my channel.
#jesscrafting #jesscraftingscottage