
Crochet Ice Cream Cone Pin Pattern – Free Crochet Pattern
Hello!
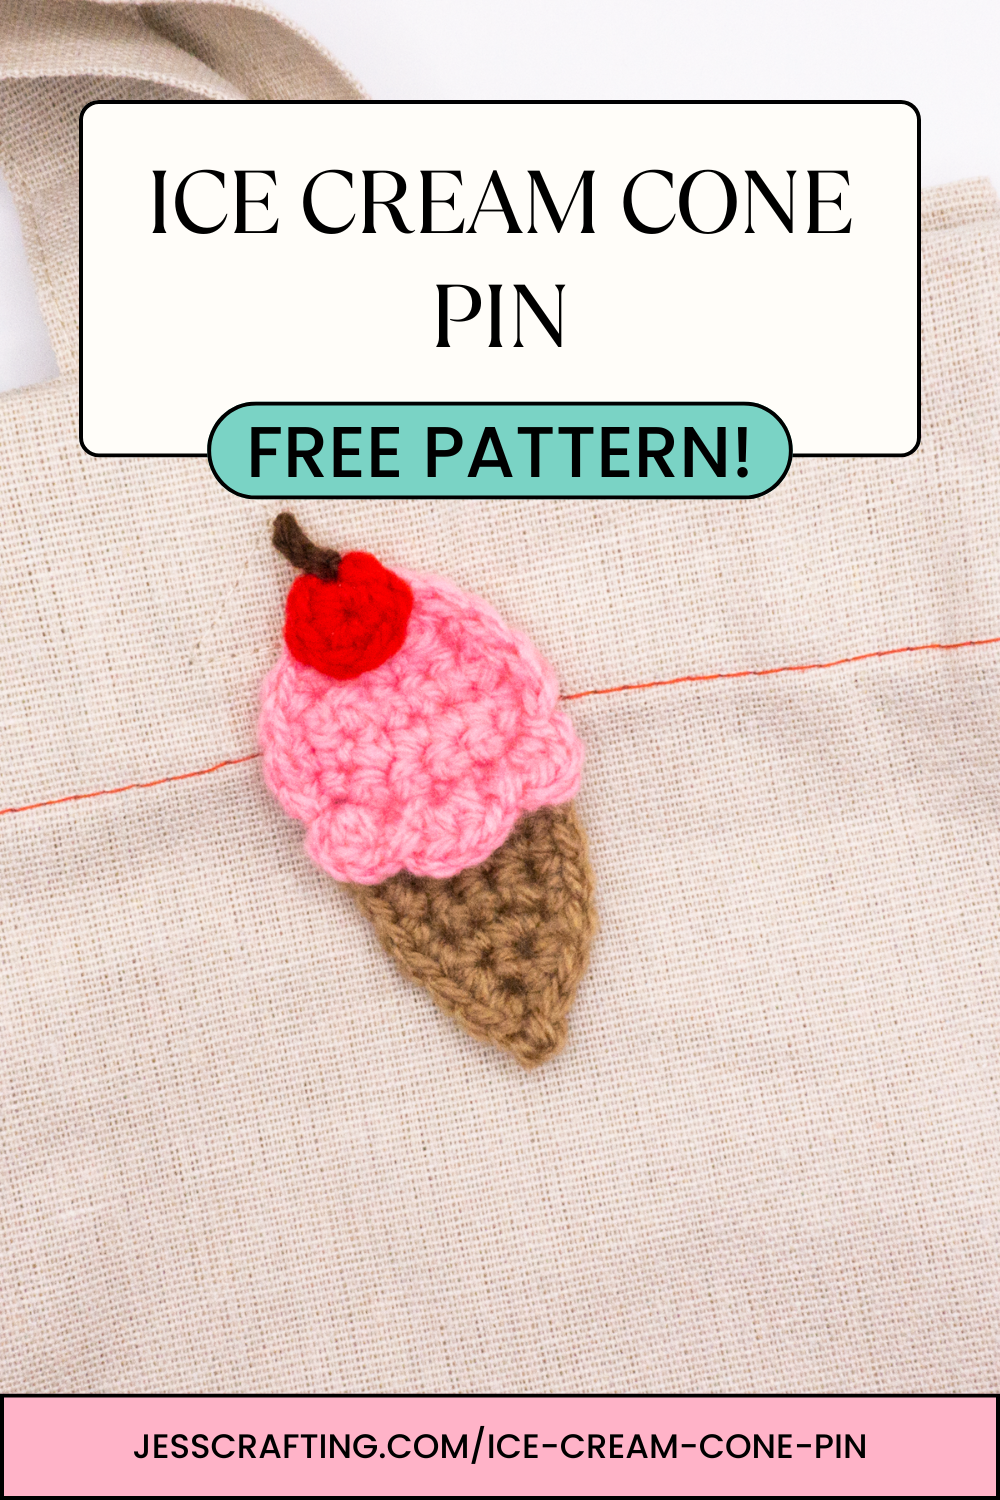
It is getting hot and it’s the perfect time to grab a sweet treat! That is where I got the idea to make this ice cream cone pin, with a cherry on top! You can make this in any flavour you like and add this cute detail to any bag or outfit you are wearing.
Let’s get started!
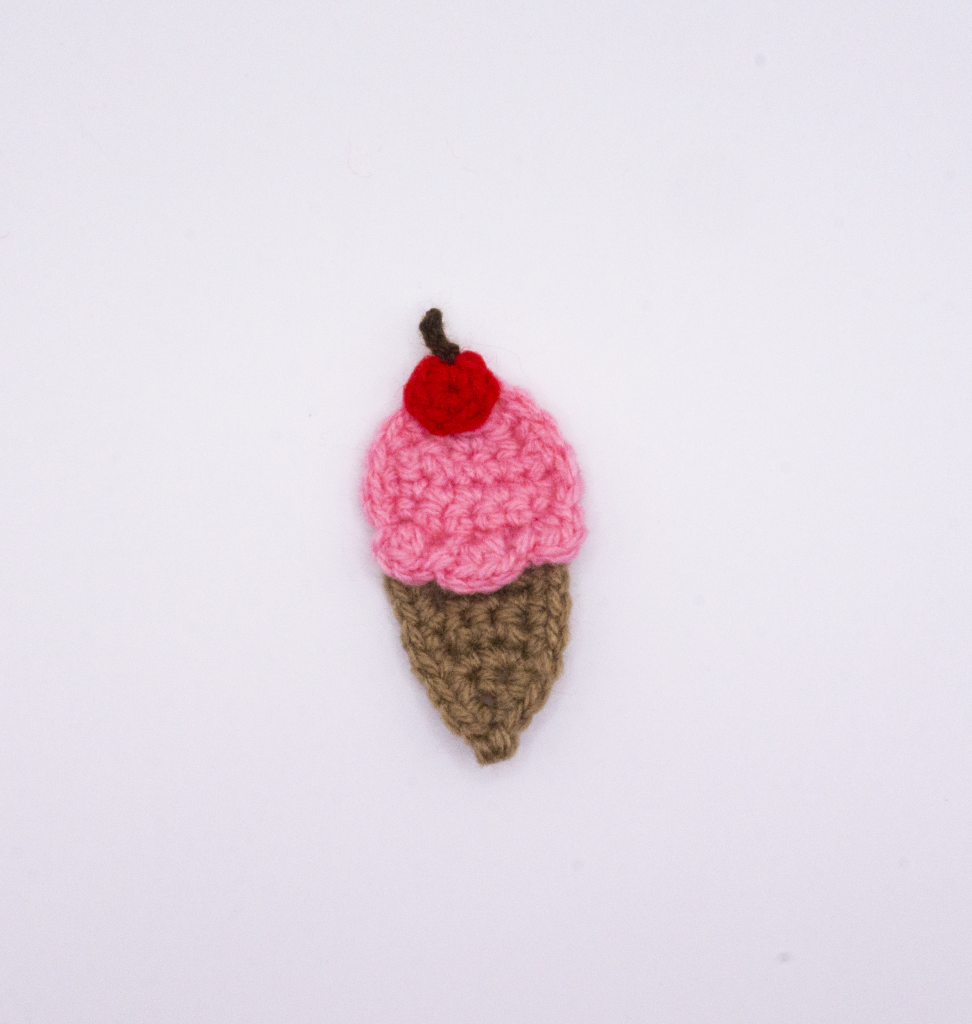

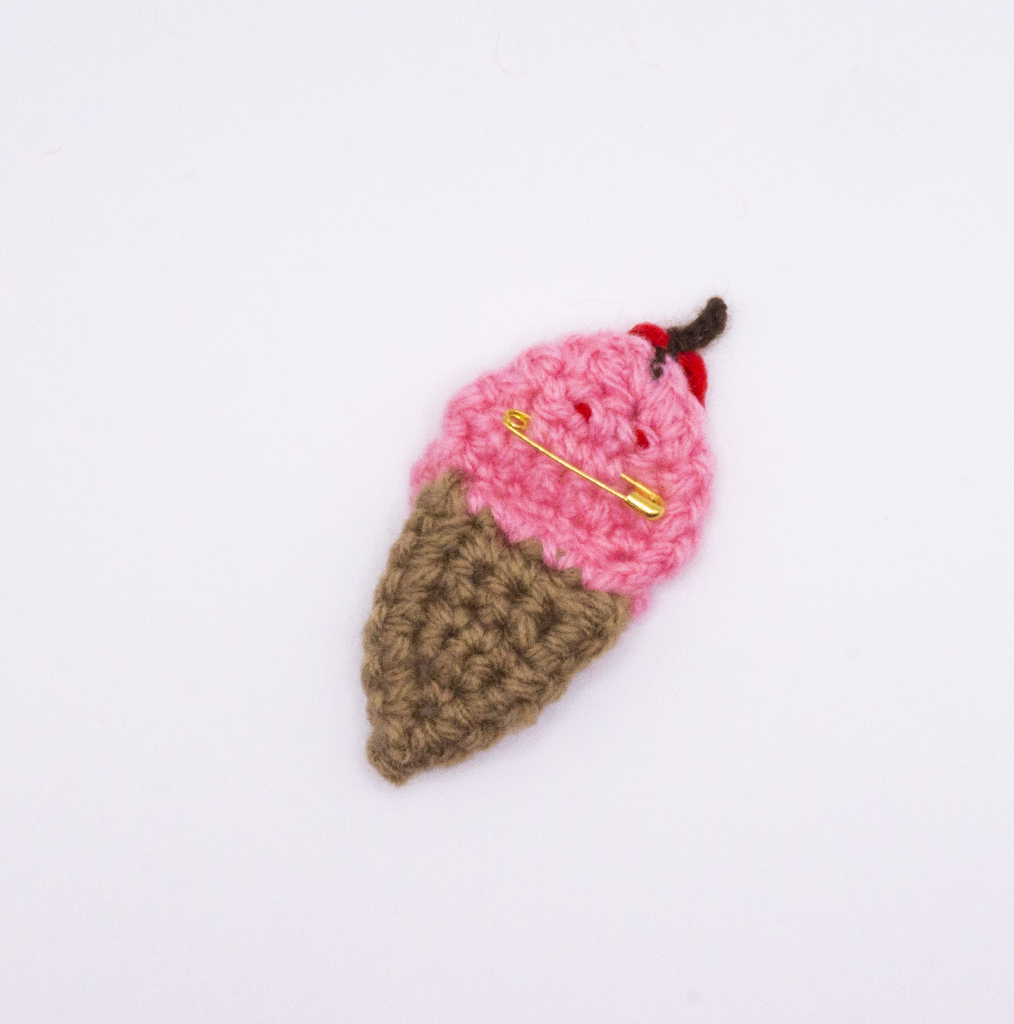
Table of Contents
Materials:
3.00 mm Crochet Hook
1.80 mm Crochet Hook
DK Weight Yarn
Lace Weight Yarn
Tapestry Needle
A Pair of Scissors
Stitch Marker
Small Safety Pin (7/8″) Optional
Note: The numbers in the brackets represent the number of stitches in each round.
Abbreviations
CH – Chain
SC – Single Crochet (DC in UK terms)
SC2TOG – Single Crochet Two Stitches Together (DC2TOG in UK terms)
SC3TOG – Single Crochet Three Stitches Together (DC3TOG in UK terms)
HDC – Half-Double Crochet (HTR in UK terms)
FLO – Front Loop Only
SLST – Slip Stitch
ST(s) – Stitch(es)
FO – Finish Off

Pattern:
Cone:
CH 2.
Row 1: SC in 2nd ST from Hook. Turn. (1)
Row 2: CH 1. 2 SC in ST. Turn. (2)
Row 3: CH 1. 2 SC in each ST. Turn. (4)
Row 4 – 6: CH 1. SC in each. Turn. (4)
Change colour to ice cream flavour. FO for cone colour.
Row 7: CH 1. SC in next. SC in next. SC 1 in next 2. Turn. (5)
Row 8: CH 1. In FLO: SC 2, SC in next 3. SC 2. Turn. (7)
Row 9: CH 1. SC in each ST. Turn. (7)
Row 10: CH 1. SC2TOG. SC 3. SC2TOG. Turn. (5)
Optional: When you reach the SC 3. SC around a safety pin.
Row 11: CH 1. SC2TOG. SC 1. SC2TOG. Turn. (3)
Row 12: CH 1. SC3TOG. (1)
FO.
With ice cream held upside down. Attach ice cream flavour to first stitch in extra loop from Row 8.
CH 1. HDC in same ST. CH 1. SLST in next. CH 1. HDC 2 in each. CH 1. SLST in next. CH 1. HDC in next CH 1. SLST in same ST.
Border for Ice Cream:
SC 10 around top of ice cream. SLST into shell Row. FO. Leave tail for sewing on pin if you didn’t in Row 10.
Border for Cone:
Attach yarn in left side of ice cream cone.
SC 6 down side. CH 2. SLST into 1st CH. SC 6 up side. SLST into cone and FO.
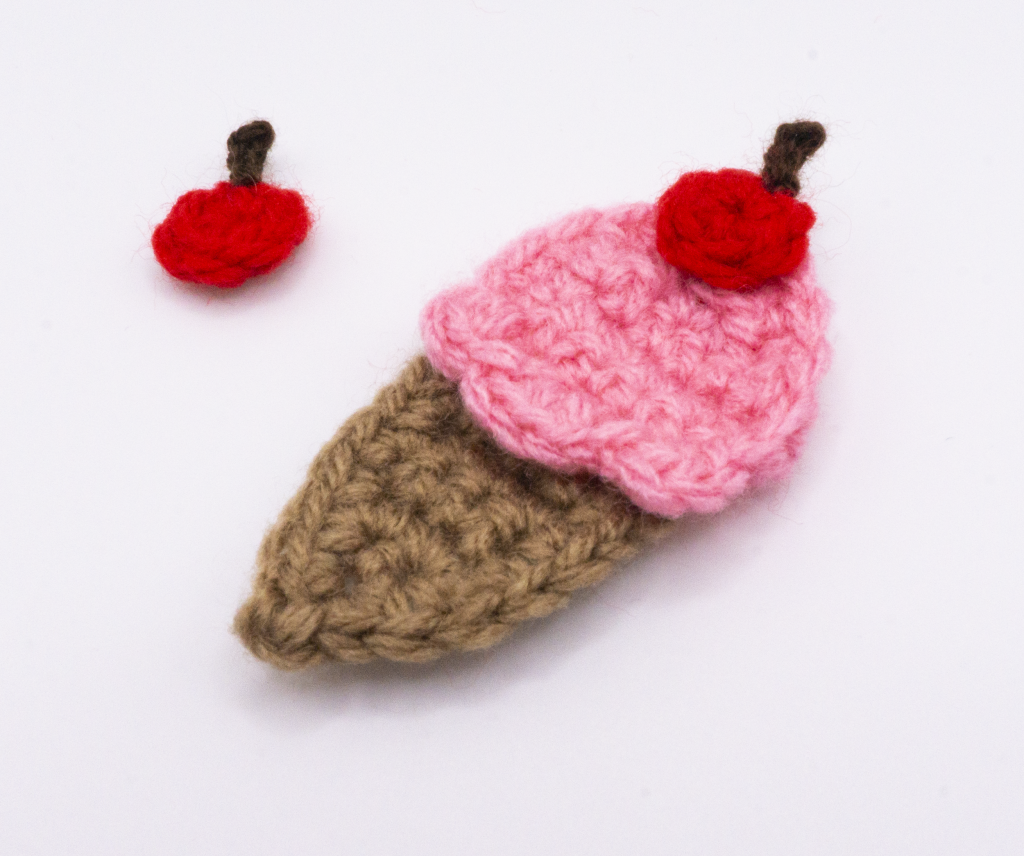
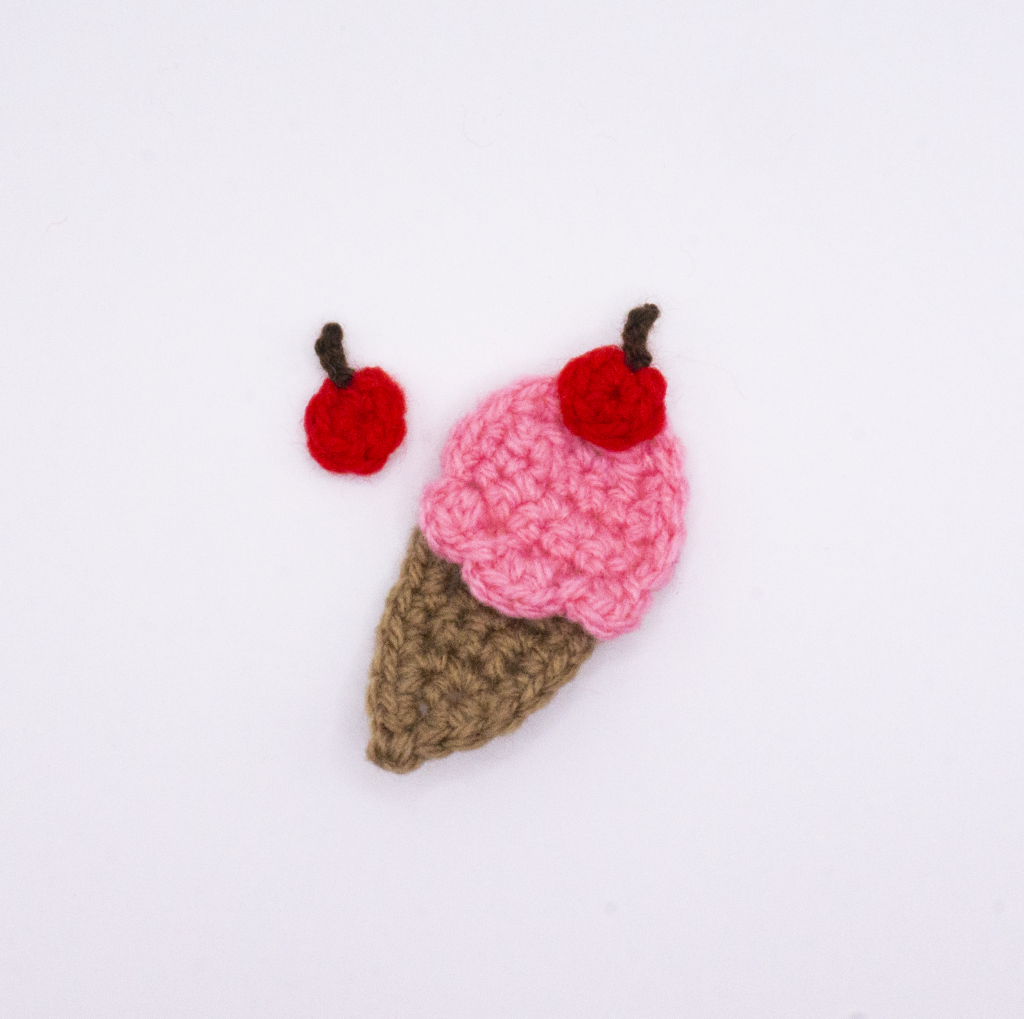
Cherry:
With DK weight yarn and 3 mm (D) hook:
Round 1: 6 SC in MR. (6)
FO with Insivible FO in first ST. Leave tail for sewing onto ice cream.
Stem:
With lace weight yarn and 1.8 mm hook
Attach yarn onto top of cherry and CH 4. SLST into the 3 remaining CHs and the ST you attached the yarn to.
FO. Weave in ends.
Here is the video tutorial with subtitles:
Video Tutorial:
Ice Cream Cone Pin Complete!
Let me know what flavours you make in the comments below.
Happy crafting!
Jess Crafting/Jess Crafting’s Cottage
Pattern for personal use only. Feel free to sell the completed Ice Cream Cone Pin though! Please link back to my blog or my channel.
#jesscrafting #jesscraftingscottage