
Crochet Lavender Flower Pattern – FREE PATTERN – Essential Oil Diffuser – Step by Step Tutorial – 2 Ways
Hello!
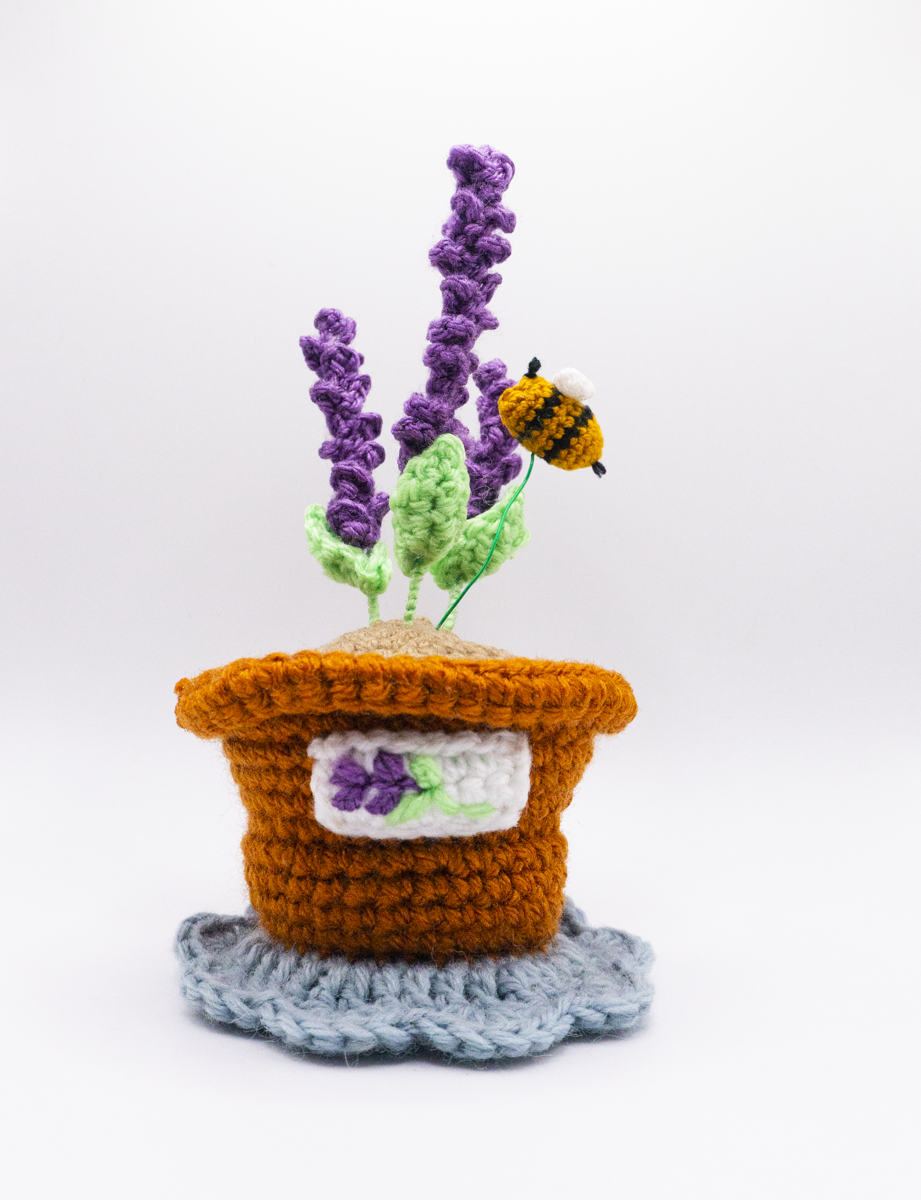
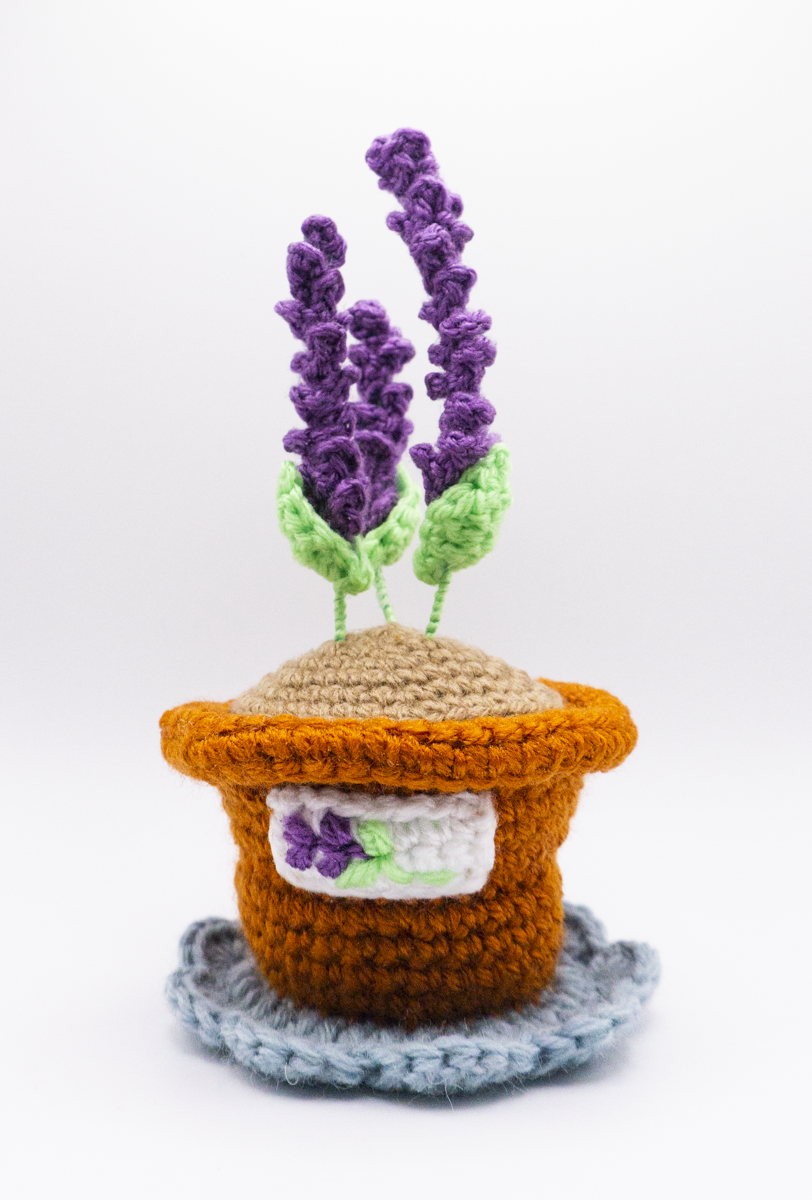
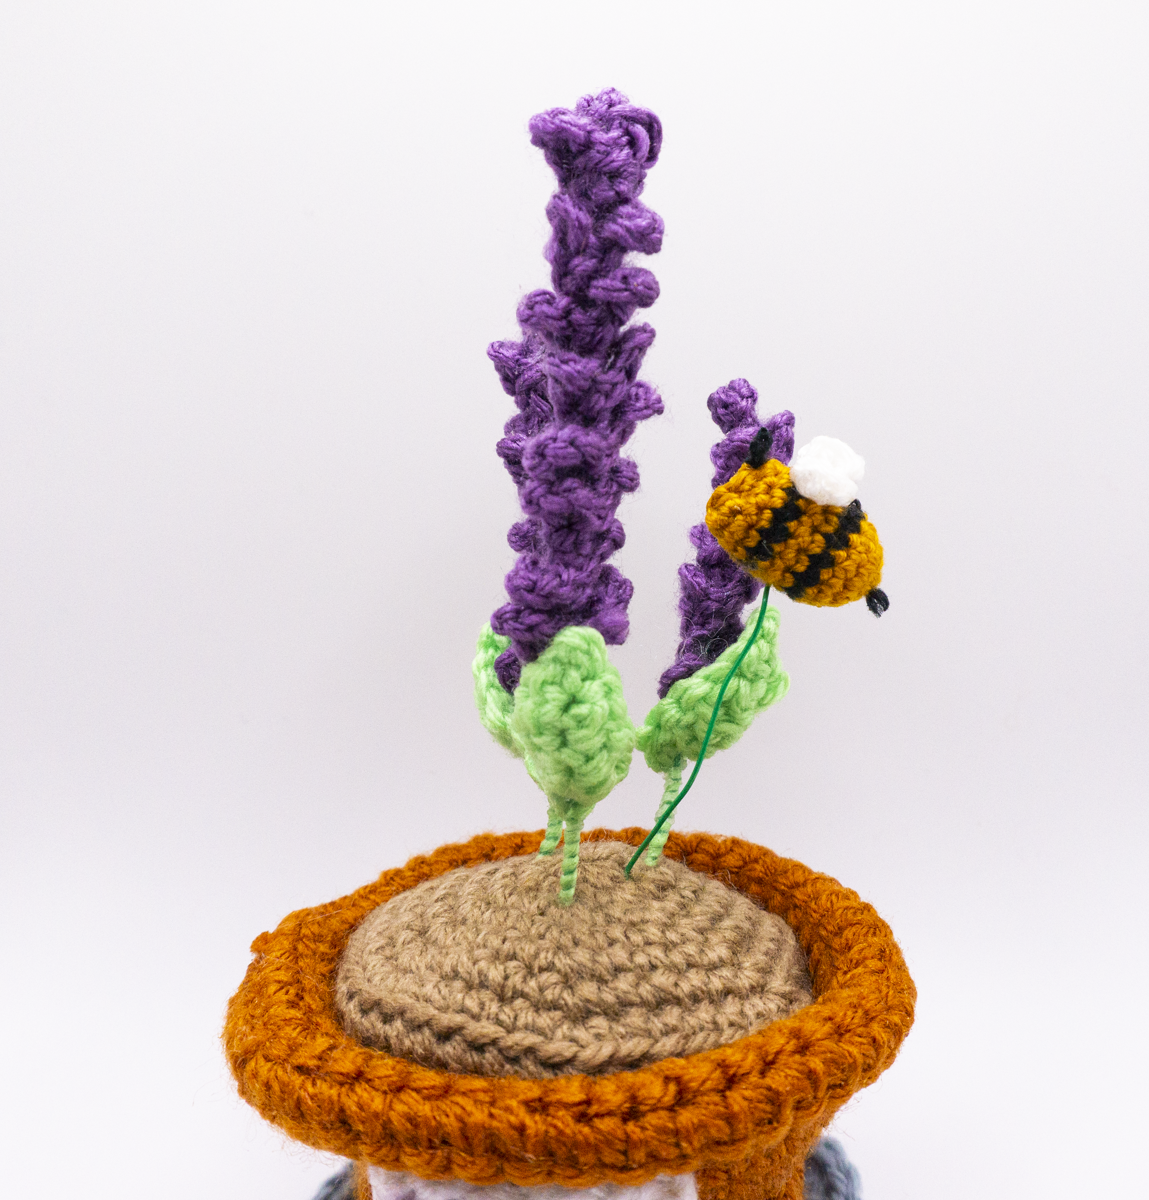
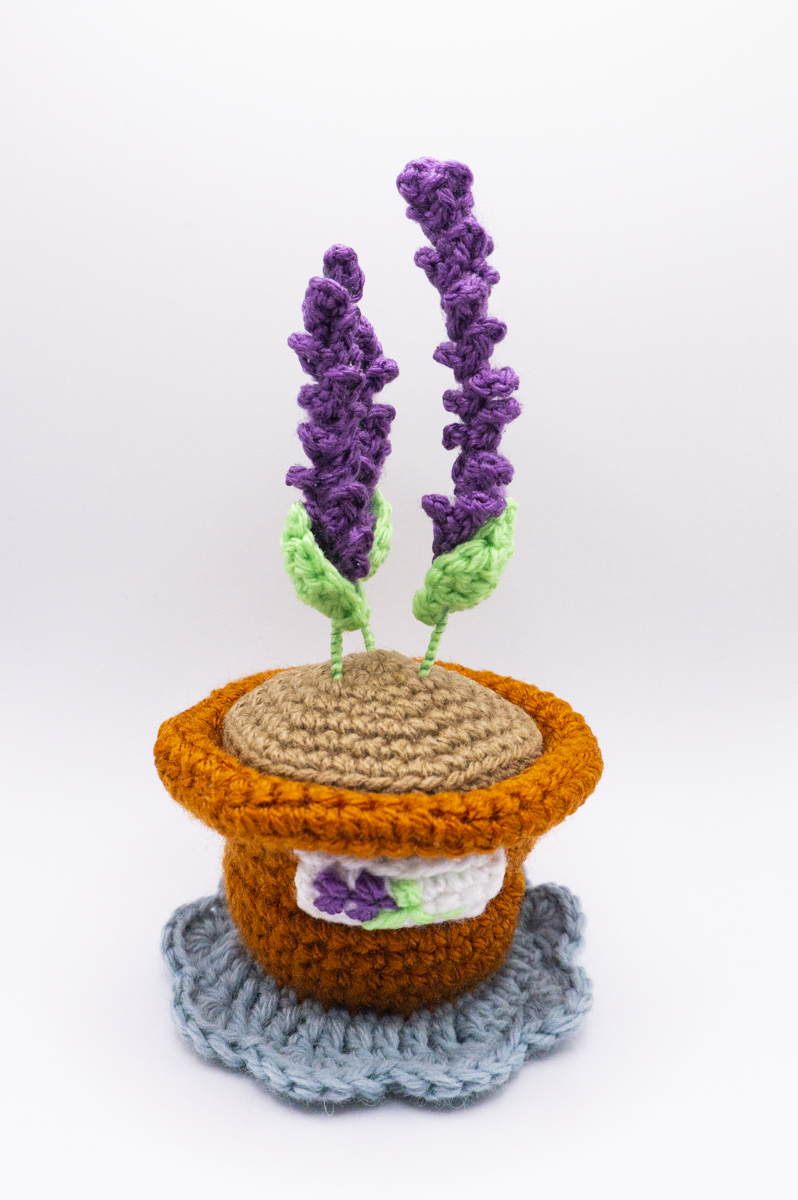
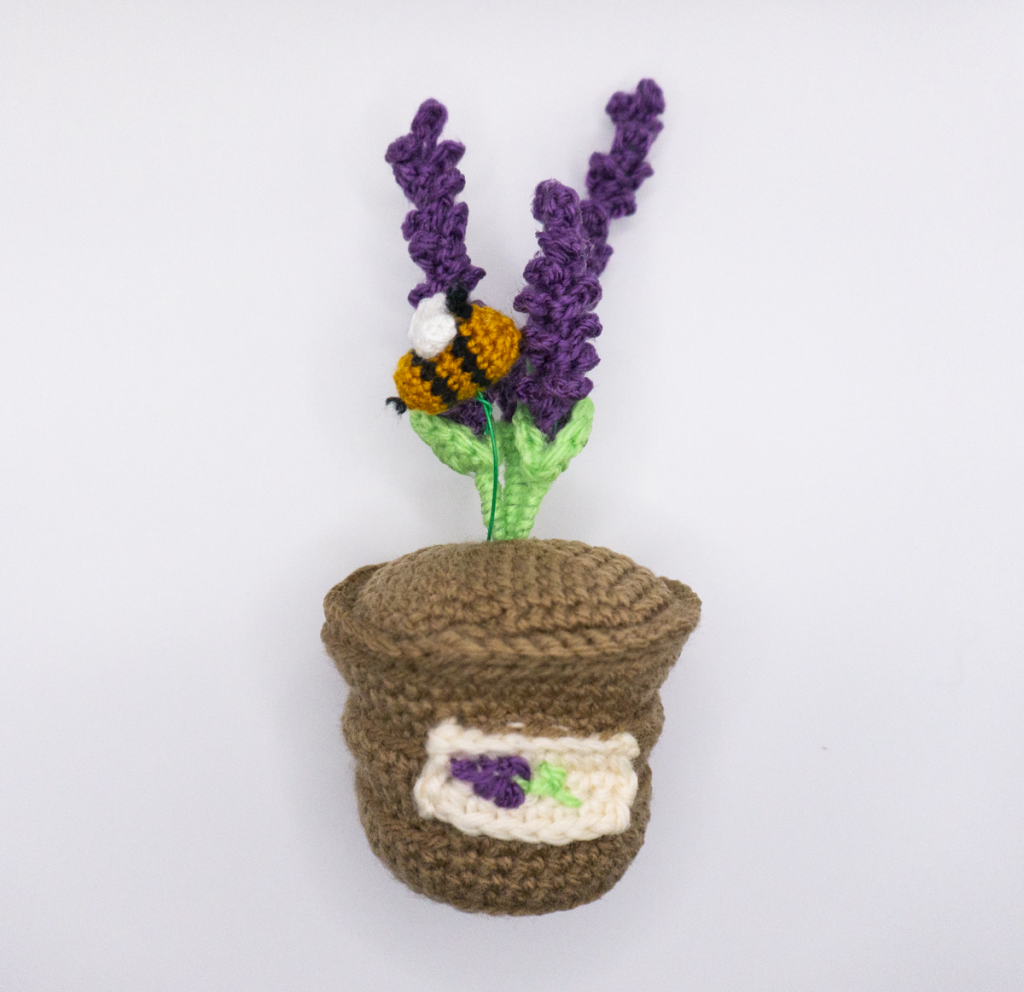
It is finally time to share the Lavender Flower crochet pattern! This was so fun to design and really brings a spot of joy into the room. I have already made three and everyone has really enjoyed them. There is also a bonus bee pattern if you would like to add a cute little friend for your flower. If you want to try out a smaller project, please check out my sunflower plant pattern!
This pattern is what truly pushed me to continue designing patterns. I felt so inspired after designing this pattern. It made me realize that it is ok to undo and undo and undo a design until it looks right! I have also included a picture of the first pot design and the final product so you can see what the different phases of the design process looks like!
This pattern uses DK and lace yarn, but you will only need the lace yarn if you are making the bee. I used hot glue to glue the flowers onto the wire, but you can probably use any glue you would like and just wait for it to dry.
Let’s start crocheting!
Table of Contents
Materials: Lavender Flower
3.00 mm Crochet Hook.
2.00 mm Crochet Hook
DK Yarn (I used Patons Astra and Loops and Threads Snuggly in Lavender)
Lace Yarn/Crochet Thread (I used Woolike and Aunt Lydia’s)
Worsted Weight (I used Lion Brand Yarn Vanna’s Choice in Terracotta)
Tapestry Needle
A Pair of Scissors
Plant Wire
Stuffing
Cotton Ball (optional)
Note: The numbers in the brackets represent the number of stitches in each row
Abbreviations: Lavender Flower
CH – Chain
MR – Magic Ring
SC – Single Crochet (DC in UK terms)
ST – Stitch
MR – Magic Ring
TR – Treble Crochet (DTR in UK terms)
HDC – Half Double Crochet (HTR in UK terms)
DC – Double Crochet (TR in UK Terms)
SC2TOG – Single Crochet Two Stitches Together (DC2TOG in UK terms)
SK – Skip
SLST – Slip Stitch
FO – Finish Off
Pattern: Lavender Flower
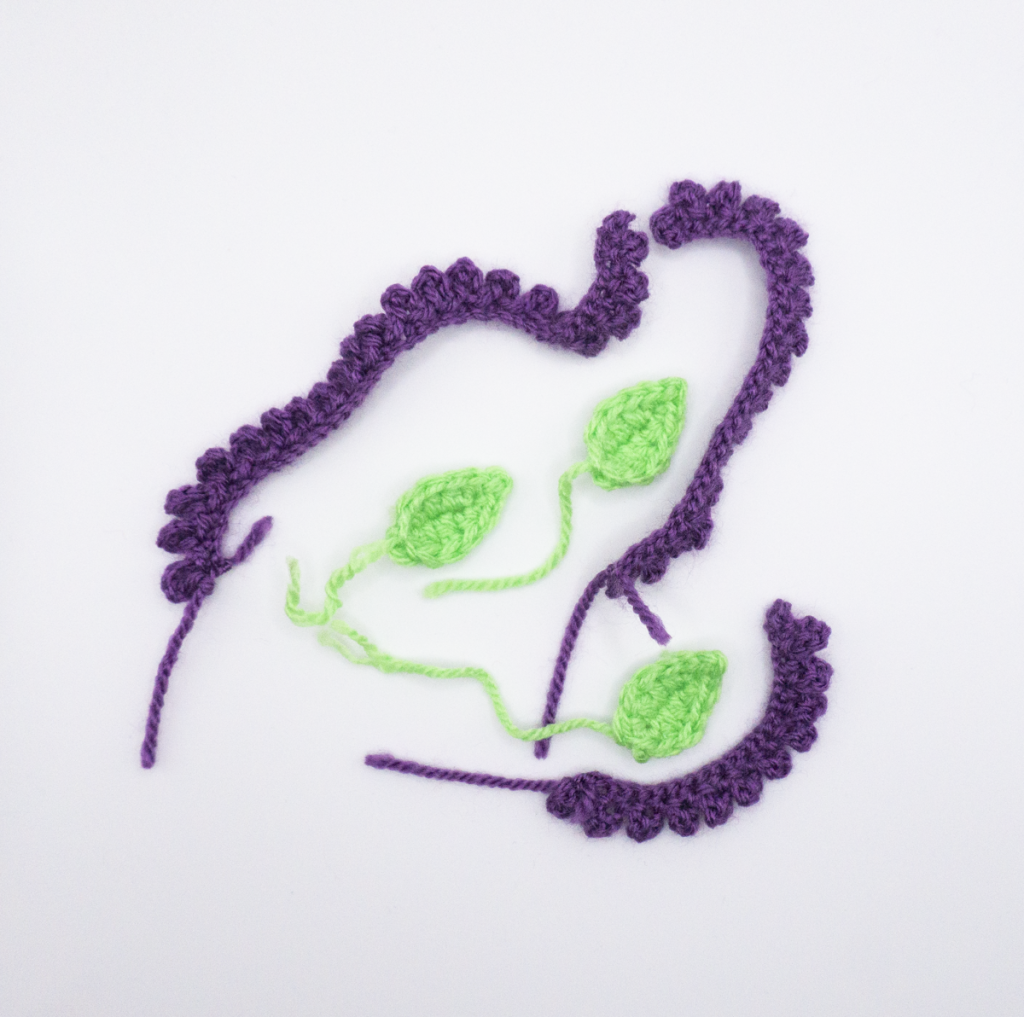
Flowers (in three sizes) (Flower #1/#2/#3)
Using 3.00 mm hook.
Chain (45/35/25)
SLST into 4th chain from hook.
Chain 4. SLST into 3rd CH from hook. SK 1. SLST into next.
*CH 4. SLST into 3rd CH from hook. SK 1. SLST into next.* Repeat a total of 10/10/6 times.
*CH 5. SLST into 4th CH from hook. SK 1. SLST into next.* Repeat a total of 9/4/2 times.
Flower #2: CH 4. SLST into 4th chain from hook. SLST into last ST. FO.
Flower #3: CH 4. SLST into 4th chain from hook. SLST into last ST. FO.
SLST into last stitch. FO.
Leaves – make 3
CH 6.
SC into 2nd chain from hook.
DC in next 2. HDC in next. SC in last. Chain 2. Slst into 1st. SC into same stitch as SC. HDC on other side of chain. DC in next 2. SC in last.
FO with tail.
Cut three pieces wire 5 inch/12 cm long.
Glue flowers and leaves onto wire.
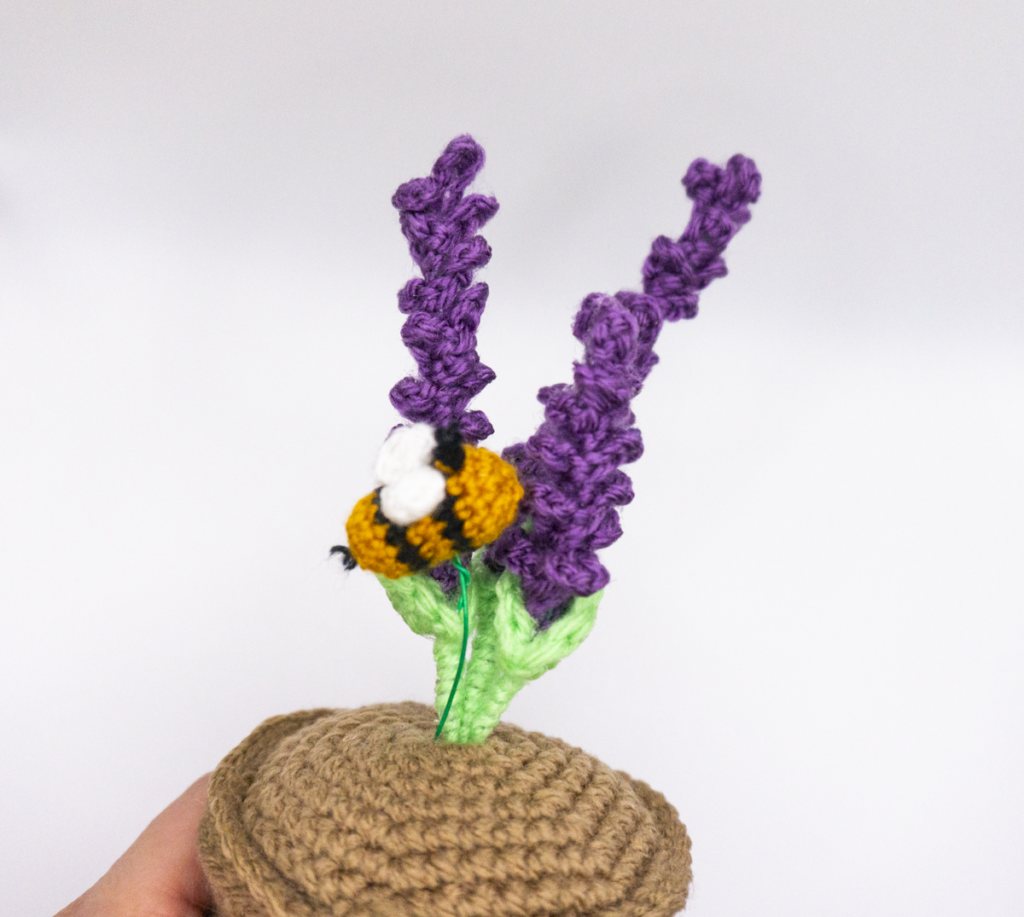
Bee
Round 1: 6 SC in MR. (6)
Round 2: 2 SC in each ST.(12)
Round 3: SC around. (12)
*Change to black yarn*
Round 4: SC around. (12)
*Change to yellow yarn*
Round 5 – 6: SC around. (12)
Stuff and insert plant wire.
*Change to black yarn (leave a tail when you cut the yarn so you can make the stinger)*
Round 7: SC around. (12)
*Change to yellow yarn*
Round 8 – 9: SC around. (12)
*Stuff bee*
Round 10: SC2TOG. Repeat around. (6)
FO. Leave tail and sew the opening closed in the front loops only.
Using a short piece of black yarn, make the antennae.
Wings
Chain 7
Round 1: DC in 3rd CH from hook, SLST into next three STs, DC 4 in last ST, SLST into next three CH spaces on other side of CH, DC 2 in last ST.
FO with invisible FO and leave tail for sewing.
Sew the middle section of wing to the back of the bee. FO.
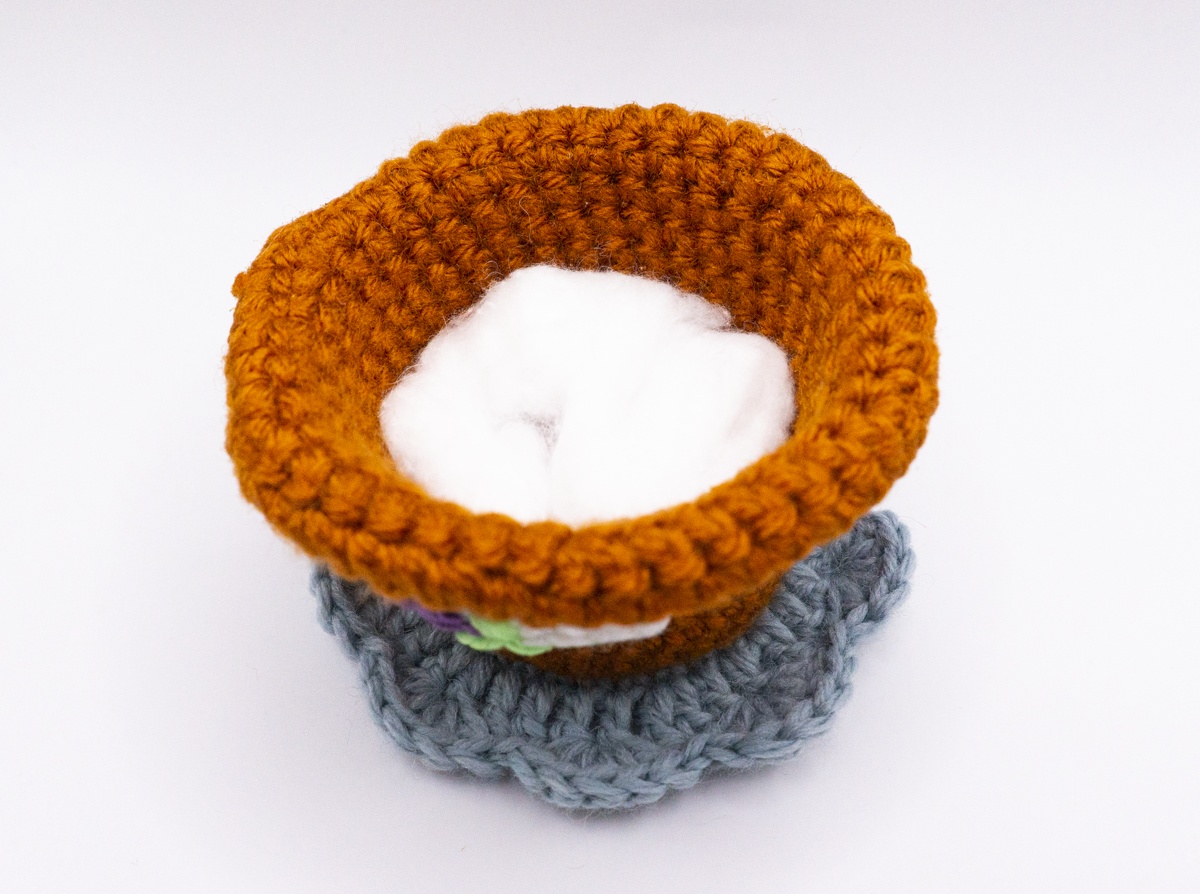
Lid (Dirt)
Using 3.00 mm Hook.
Round 1: 6 SC in MR (6)
Round 2: 2 SC in each (12)
Round 3: 1 SC, 2 SC in next. Repeat around. (18)
Round 4: 1 SC in next 2 STs, 2 SC in next. Repeat around. (24)
Round 5: 1 SC in next 3 STs, 2 SC in next. Repeat around. (30)
Round 6: 1 SC in next 4 STs, 2 SC in next. Repeat around. (36)
Round 7: 1 SC in next 5 STs, 2 SC in next. Repeat around. SLST into Back loop of 1st SC. (42)
Round 8: CH 1. SC in same ST in BLO. and around in BLO. SLST into 1st SC. (42)
Round 9: CH 1. SC in same ST. and around. SLST into BL of 1st SC. (42)
Round 10: In BLO:1 SC in next 5 STs, SC2TOG. Repeat around. (36)
Round 11: 1 SC in next 4 STs, SC2TOG. Repeat around. (30)
Sew leaves and the flower to the top of the lid.
Round 12: 1 SC in next 3 STs, SC2TOG. Repeat around. (24)
Round 13: 1 SC in next 2 STs, SC2TOG. Repeat around. (18)
Stuff but don’t over stuff.
Round 14: 1 SC in next ST, SC2TOG. Repeat around. (12)
Round 15: SC2TOG. Repeat around. (6)
FO. Leave tail and sew the opening closed in the front loops only.
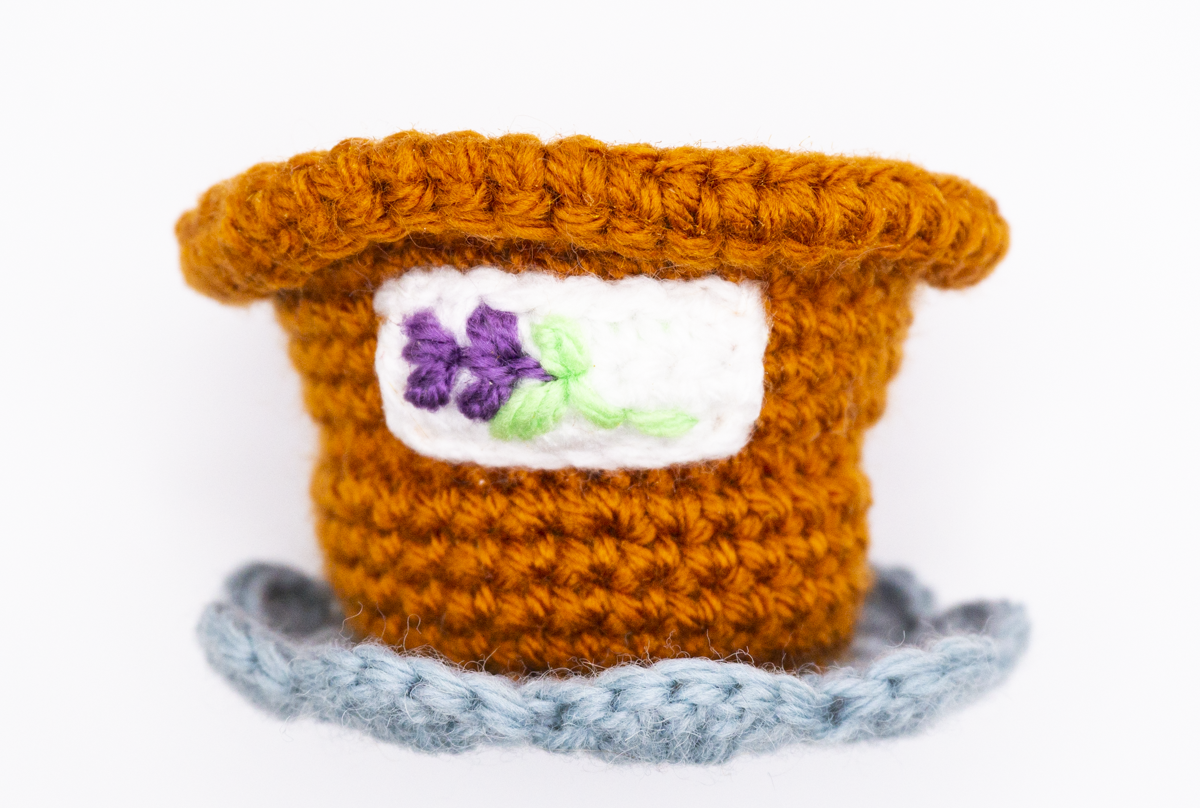
Pot and Coaster – Lavender Flower
Using 3.00 mm Hook.
Disc:
Round 1: 6 SC in MR. (6)
Round 2: 2 SC in each. (12)
Round 3: 1 SC, 2 SC in next. Repeat around. (18)
Round 4: 1 SC in next 2 STs, 2 SC in next. Repeat around. (24)
Round 5: 1 SC in next 3 STs, 2 SC in next. Repeat around. (30)
Pot:
Round 1: 6 SC in MR. (6)
Round 2: 2 SC in each. (12)
Round 3: 1 SC, 2 SC in next. Repeat around. (18)
Round 4: 1 SC in next 2 STs, 2 SC in next. Repeat around. (24)
Round 5: 1 SC in next 3 STs, 2 SC in next. Repeat around. (30)
Round 6: SC in BLO around. (30)
Round 7 – 8: SC around. (30)
Round 9: 1 SC in next 4 STs, 2 SC in next. Repeat around. (36)
Round 10: SC around with Disc – in both loops of pot and back loop of disc – (make two SC into disc on every 5th stitch). *for worsted only* (36)
*Stuff before closing*
Round 11 – 14: SC around. (36)
Round 15: 1 SC in next 5 STs, 2 SC in next. Repeat around. (42)
Round 16: 2 SC in next, 1 SC in next 6 STs. Repeat around. (48)
Round 17: SC around. (48)
FO with invisible FO.
Coaster:
Round 1: 6 SC in MR (6)
Round 2: 2 SC in each (12)
Round 3: 1 SC, 2 SC in next. Repeat around. (18)
Round 4: 1 SC in next 2 STs, 2 SC in next. Repeat around. (24)
Round 5: 1 SC in next 3 STs, 2 SC in next. Repeat around. (30)
While holding the pot and the coaster together (in front loop of pot and both loops for the coaster.
Round 6: 1 SC in each. Repeat around. SLST into 1st SC. (30)
Round 7: CH 3 or pull up loop higher to do a DC. DC in next 3. DC 2 in next. DC in next 4. DC 2 in next. SLST into CH 3.(36)
Round 8: *SK 1. 5 DC in next. SK 1. SLST in next.* Repeat around. (9 Shells)
FO with invisible FO.
Plant Label
Using 3.00 mm hook.
CH 8.
Row 1: SC into 2nd chain from hook. Then the next 6. Turn. (7)
Row 2: CH 1. SC across. Turn. (7)
Row 3: CH 1. SC across. (7)
FO. Leave tail for sewing label onto the pot.
Embroider lavender flower with yarn before attaching (using back stitch and daisy stitch)
FO.
Here the video tutorial for the Lavender Flower with subtitles:
Video Tutorial: Lavender Flower
Lavender flower complete! You can lift off the dirt and place a flat cotton pad under it and put any essential oil you would like to diffuse into your room! This is just a bonus little idea to add some practical use to your crochet.
I was thinking of also making a mini version of this lavender flower, by using the same pattern as the sunflower plant, but just have one lavender flower in the pot!
You can also check out the sunflower pin pattern as well! Or if you are ready for Autumn, you can check out the pattern for the toadstool mushroom. I have plans to share a few more autumn applique patterns in the next couple of weeks so be on the look out for the autumn garland.
Please leave me a comment below with any suggestions or questions!
Happy Crocheting!
Jessica
Pattern for personal use only. Feel free to sell the completed lavender flower though! Please link back to my blog or my channel.
#jesscrafting #jesscraftingscottage #crochetflowers


5 Comments
Pingback:
Pingback:
Pingback:
Pingback:
Pingback: